Linkedin Koen Geers: https://www.linkedin.com/in/koen-geer…
Linkedin Barry Damen: https://www.linkedin.com/in/barry-dam…
Linkedin Stan Vijverberg: https://www.linkedin.com/in/stan-vijv…
Linkedin Lex Verheij: https://www.linkedin.com/in/lex-verheij-042035205/
The original situation
KLM engine service performs quality checks on HTP disks from aeroplanes. These checks are being executed with an eddy current probe. Defects in de surface of the part can be detected with the use of this technology. During the quality check, a probe is moved across the surface of the part with the help of a Kuka robot. A piece of Teflon tape is being applied on the end of the eddy current probe to protect the precious aeroplane parts and the probe itself from any damage. This tape is applied manually by the operator of the Kuka robot and has to be replaced every hour. In this process, the operator would open the safety gates of the robot, pick up the probe from its holder and take it to his desk. At his desk, he would remove the old tape and cut a new piece of tape and apply it onto the probe the right way.
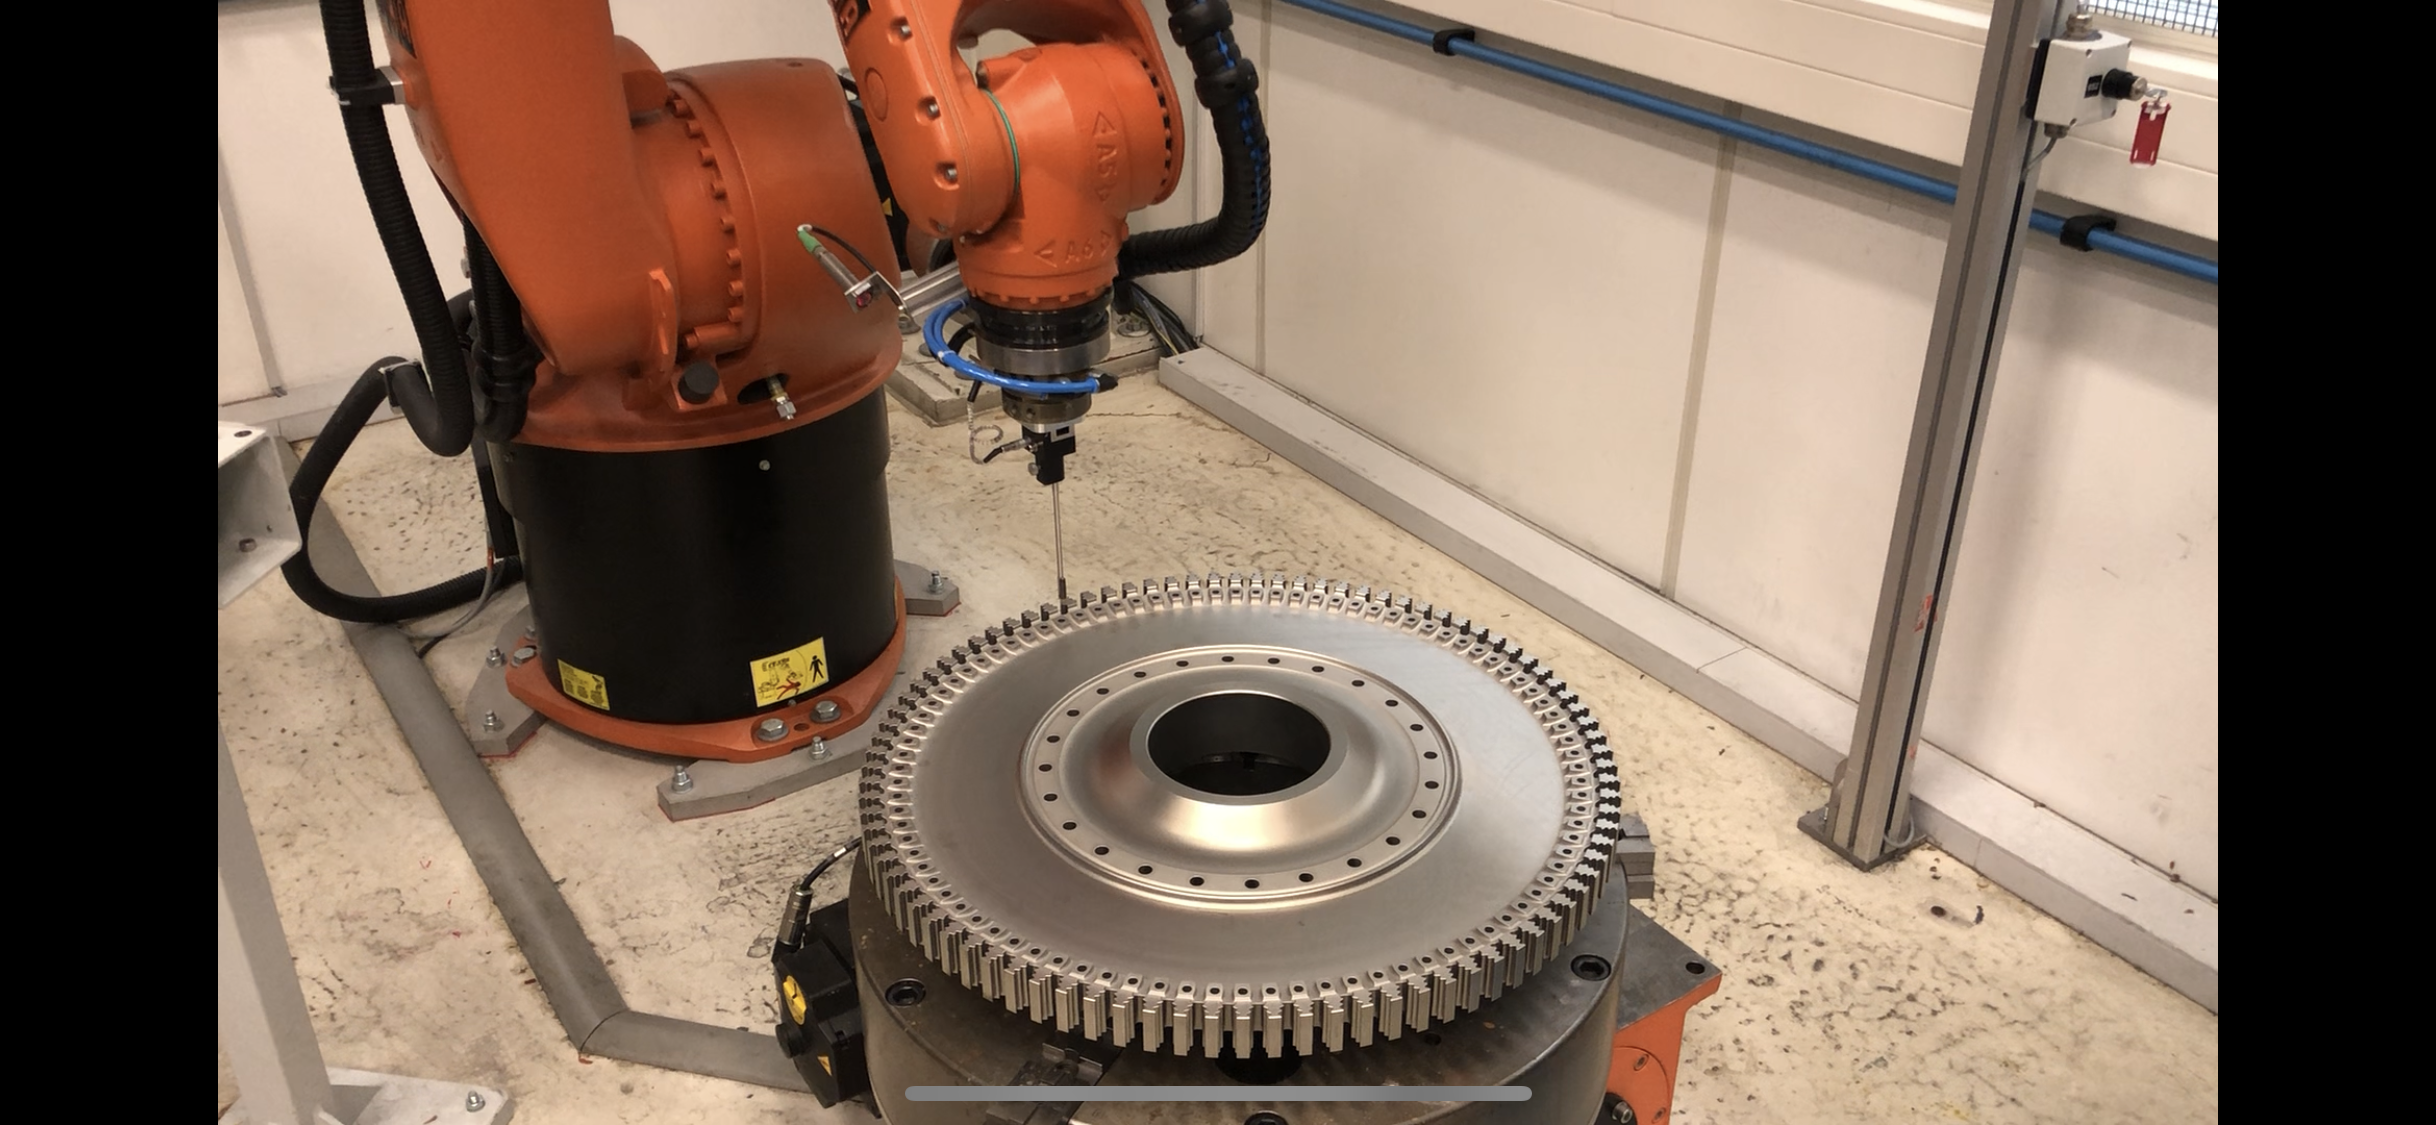
Figure 1: Original situation with a Kuka robot and HPT disk
The problem
The problem of the client was that the testing of the HTP disks still required human interaction when tape needed to be replaced to be able to proceed with testing. During this process, a lot of time got wasted applying the new tape. Further, full automation of this test process was no option because of the manual tape replacement.
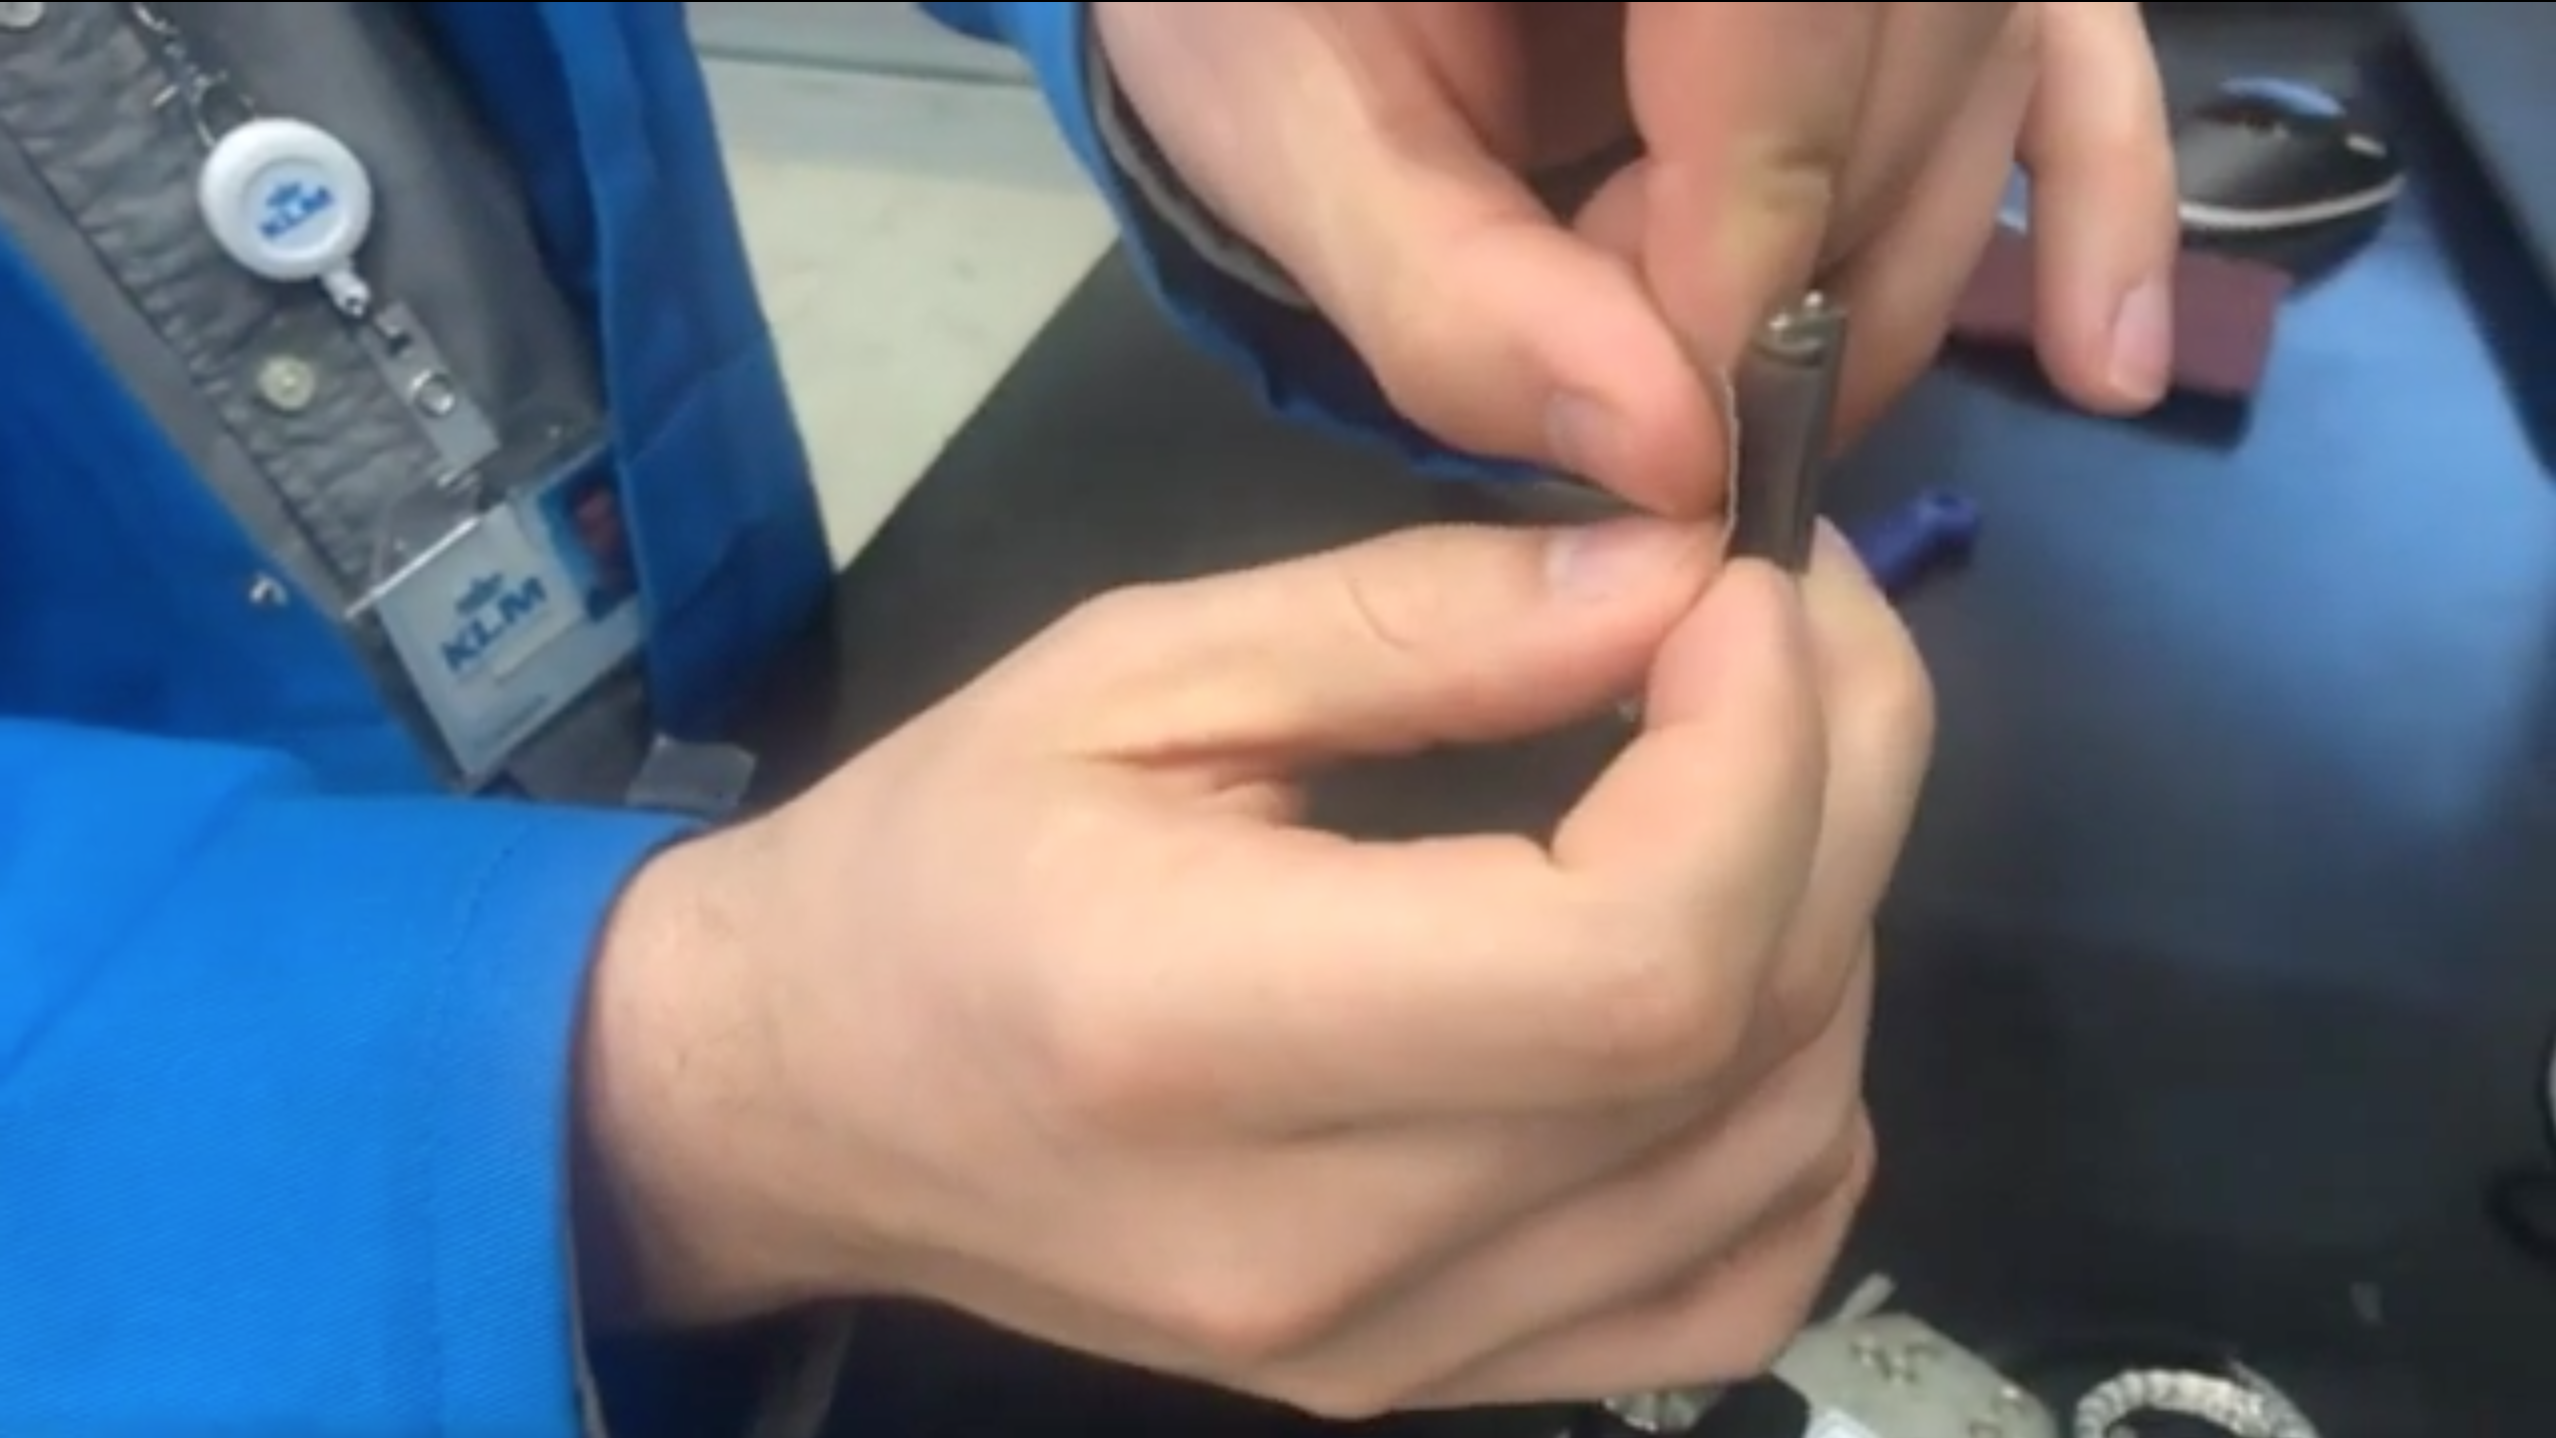
Figure 2: Applying Teflon tape
The solution
To automate the process of tape replacement a machine is designed and produced. This machine can remove, replace and check the tape with the cooperation of a robot. The sub solutions will be explained one by one.
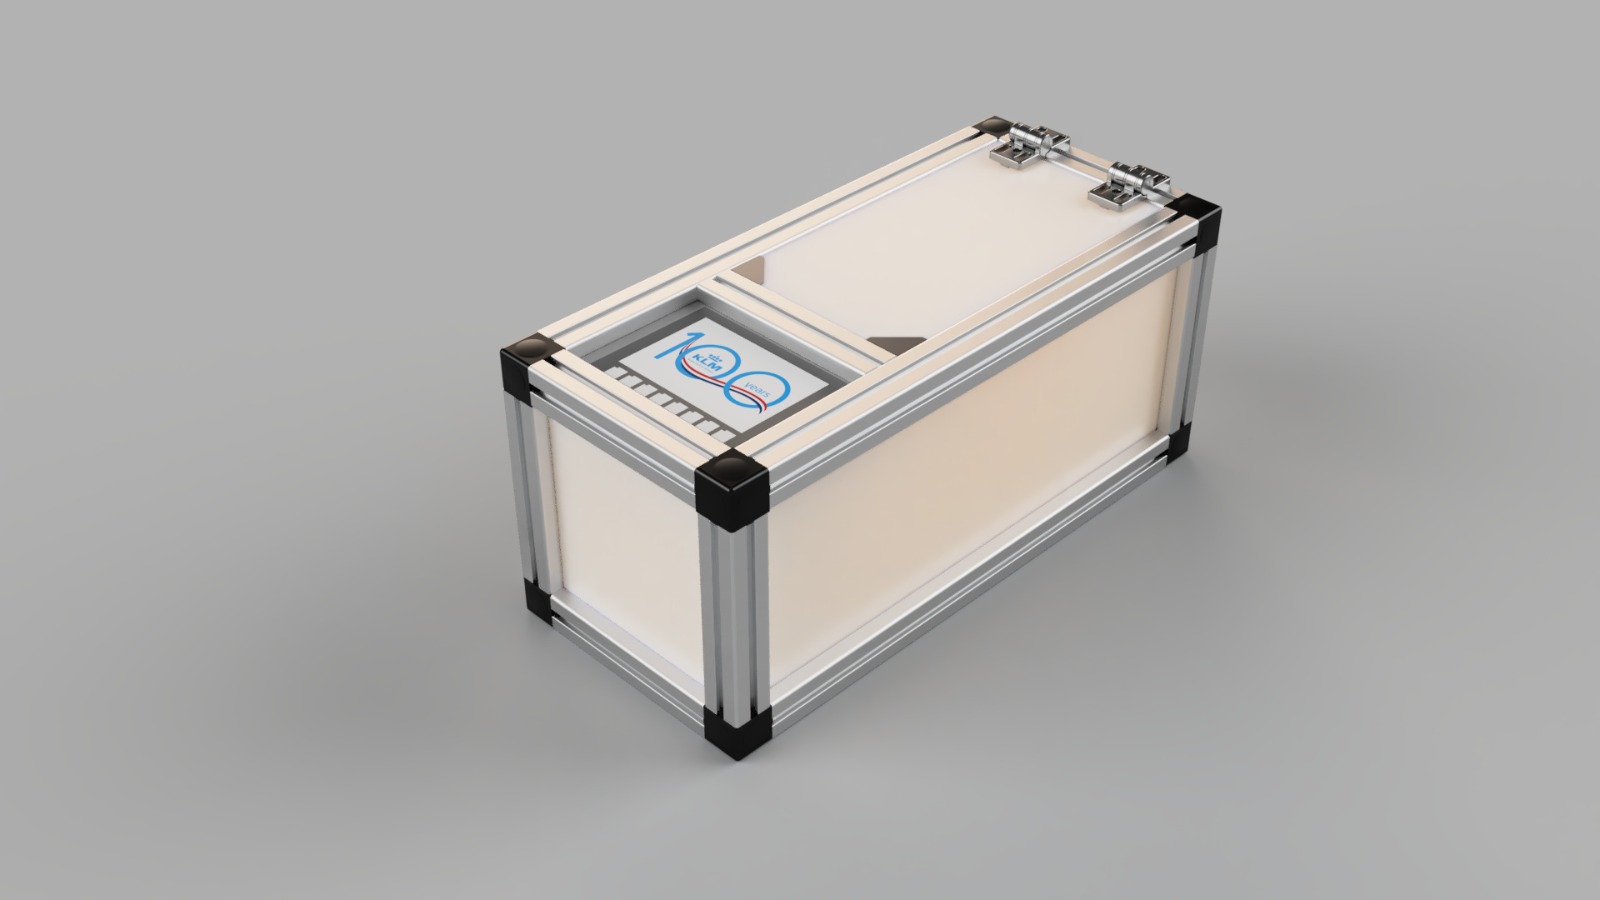
Figure 3: Render of the solution
New tape placement
The tape placement is a major part of our automation solution. This process is being realised by a convenient way of tape distribution. The main part of the tape distribution is the specially designed wheel. This wheel consists out of little chambers in which the probe fits well. Next to each side of the chamber there is a double wall with a small gap in between the walls. The tape can be applied on to this wheel as shown in the picture. The gab provides a way for the blade to cut the tape. The blade is connected to a pneumatic cylinder. When the wheel rotates one step, the cylinder will extend and the blade is pressed through the tape in the gap between the walls. After this step, the robot can move its arms with the probe into the chamber and pick up a new piece of tape. The cylinder will retract and the robot can press down the tape on the probe. This is done by rotation of the tool and rubbing the probe against a compressible part connected to the end of the cylinder. The width of the tape that’s being cut will we be the exact width needed to cover the face of the probe well.
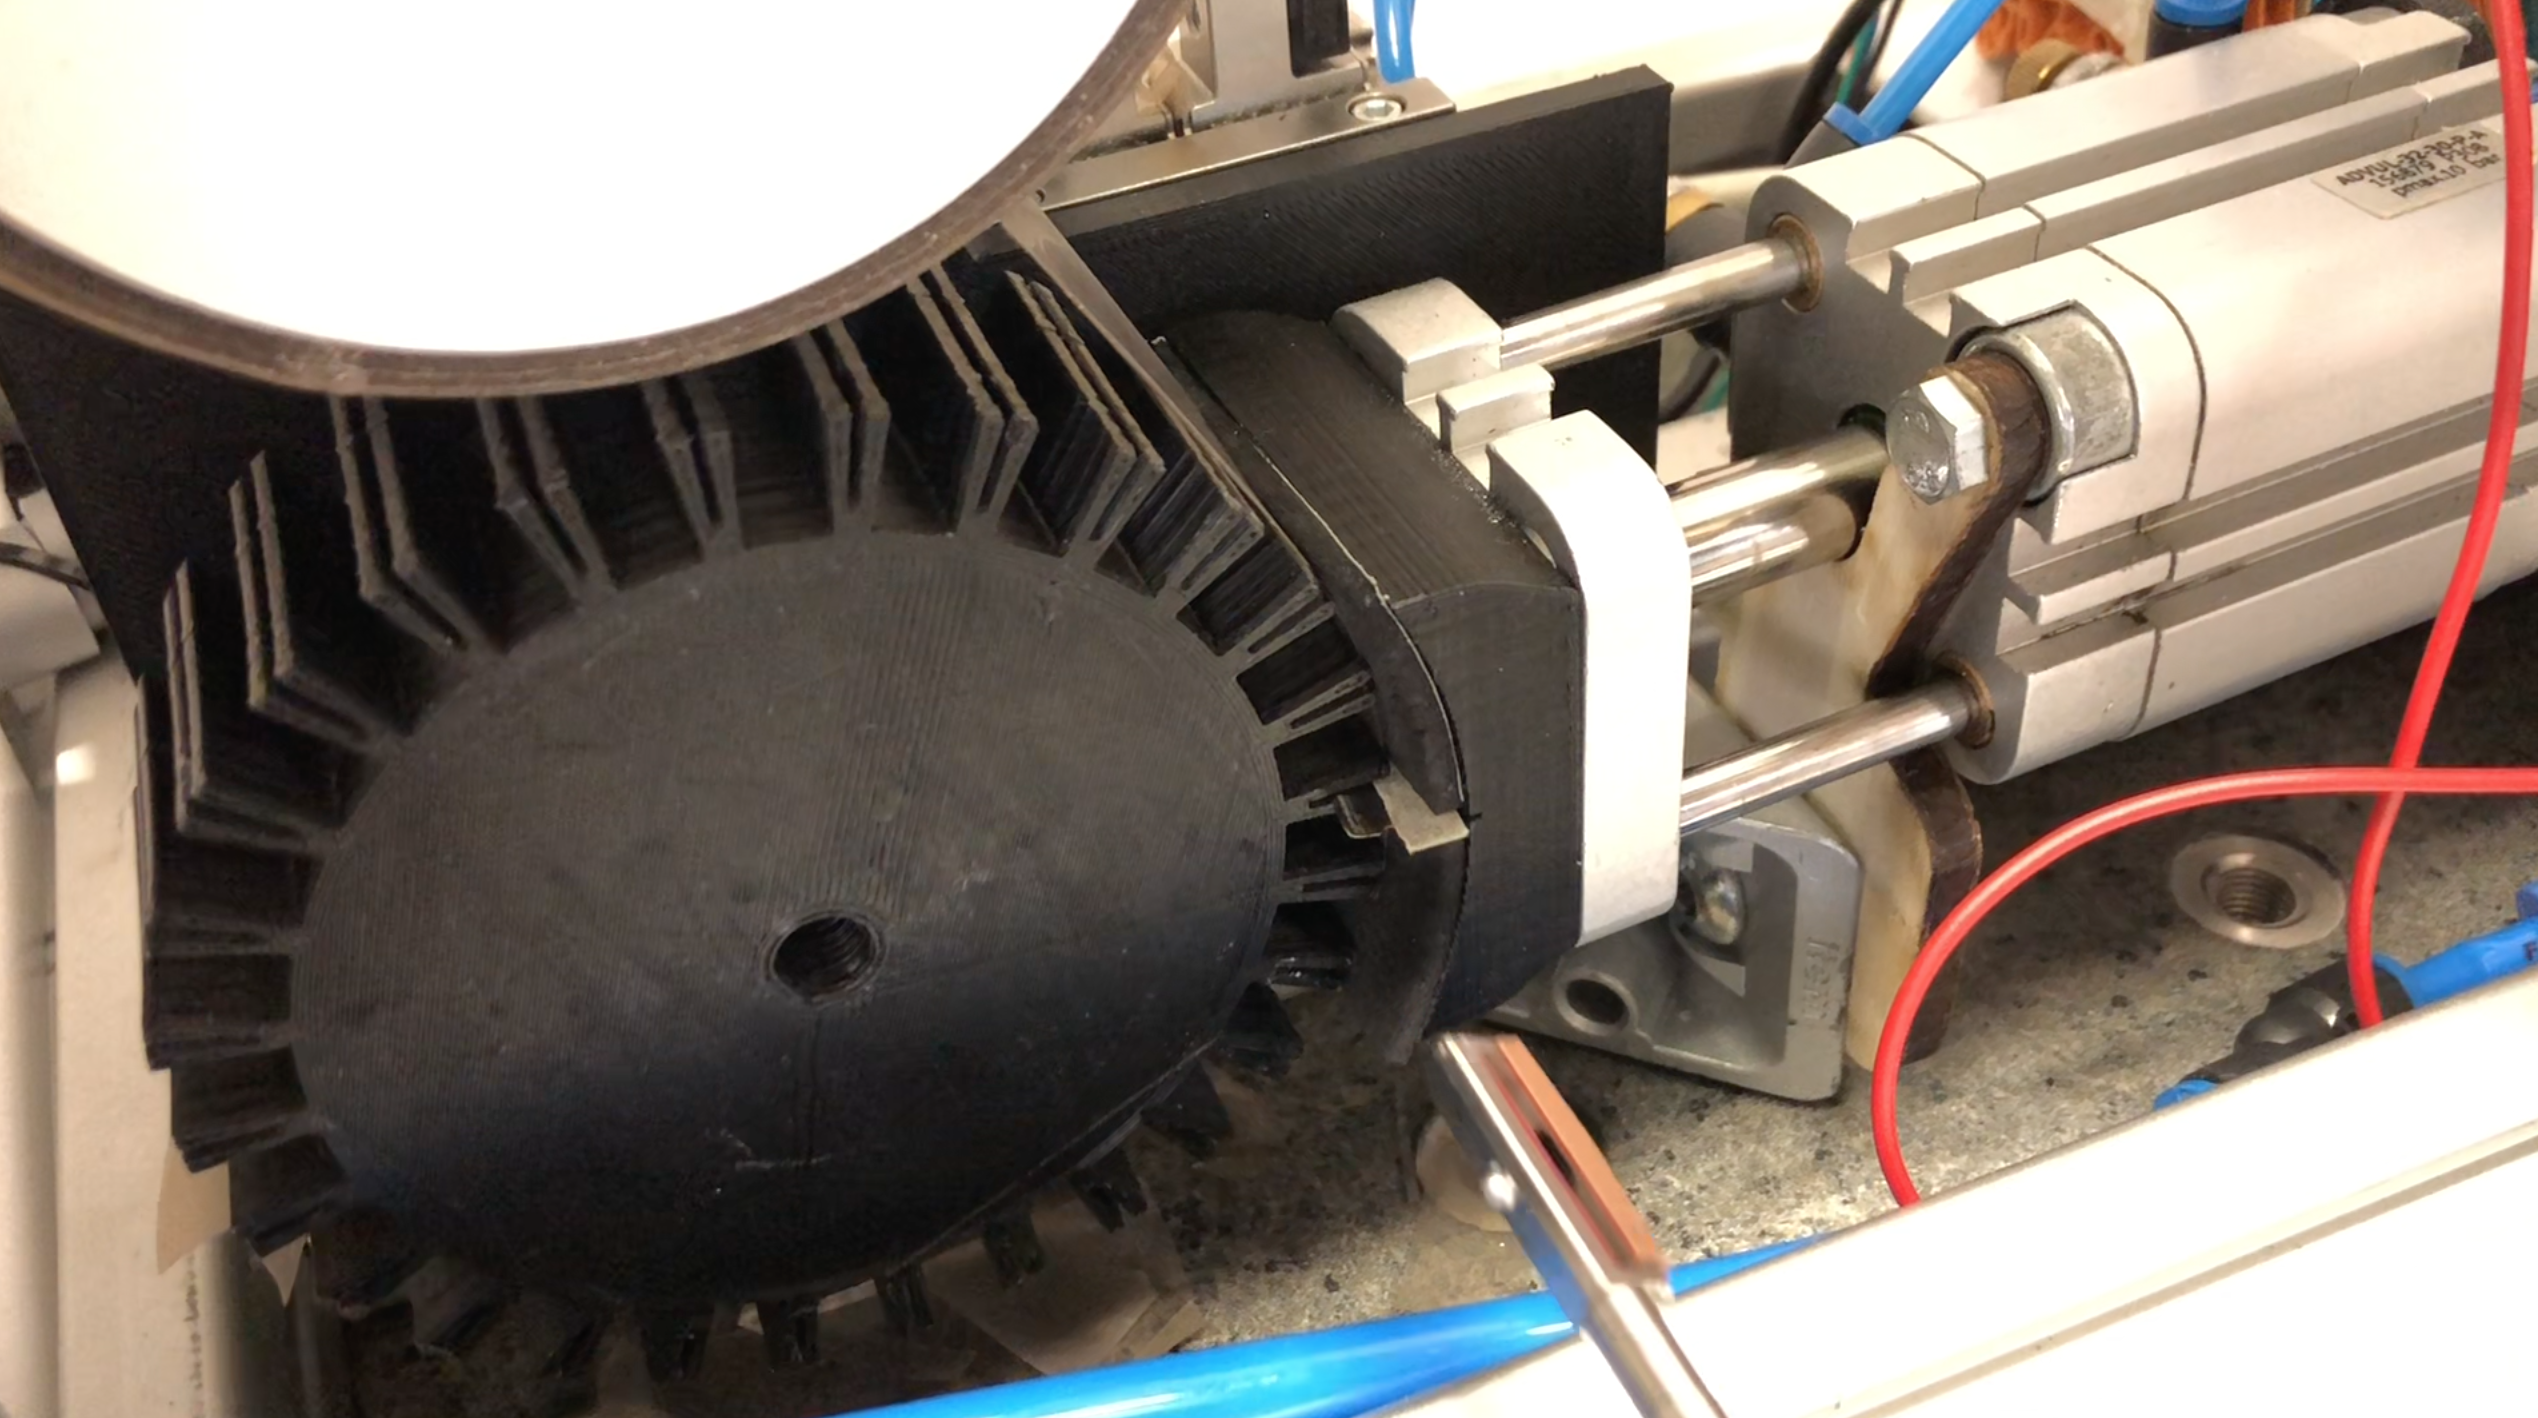
Figure 4: Cutting wheel
Tape removal
After 1/5th of the inspection of the HTP disk, tape needs to be removed due to wear. The automation of the process starts when applying the tape. Tape is applied with a little flap at the short side of the probe. This flap serves as an easy way to grab the tape when removal is needed. With the use of a pneumatic gripper, the tape flap can be gripped on to. After gripping of the flap, the tape can be peeled off with the right robot movements. Now there is one problem left, which is the tape that’s stuck on the gripper. This tape can be blown off with a stream of high-pressure air. Now the worn tape falls into a box which collects the tape.
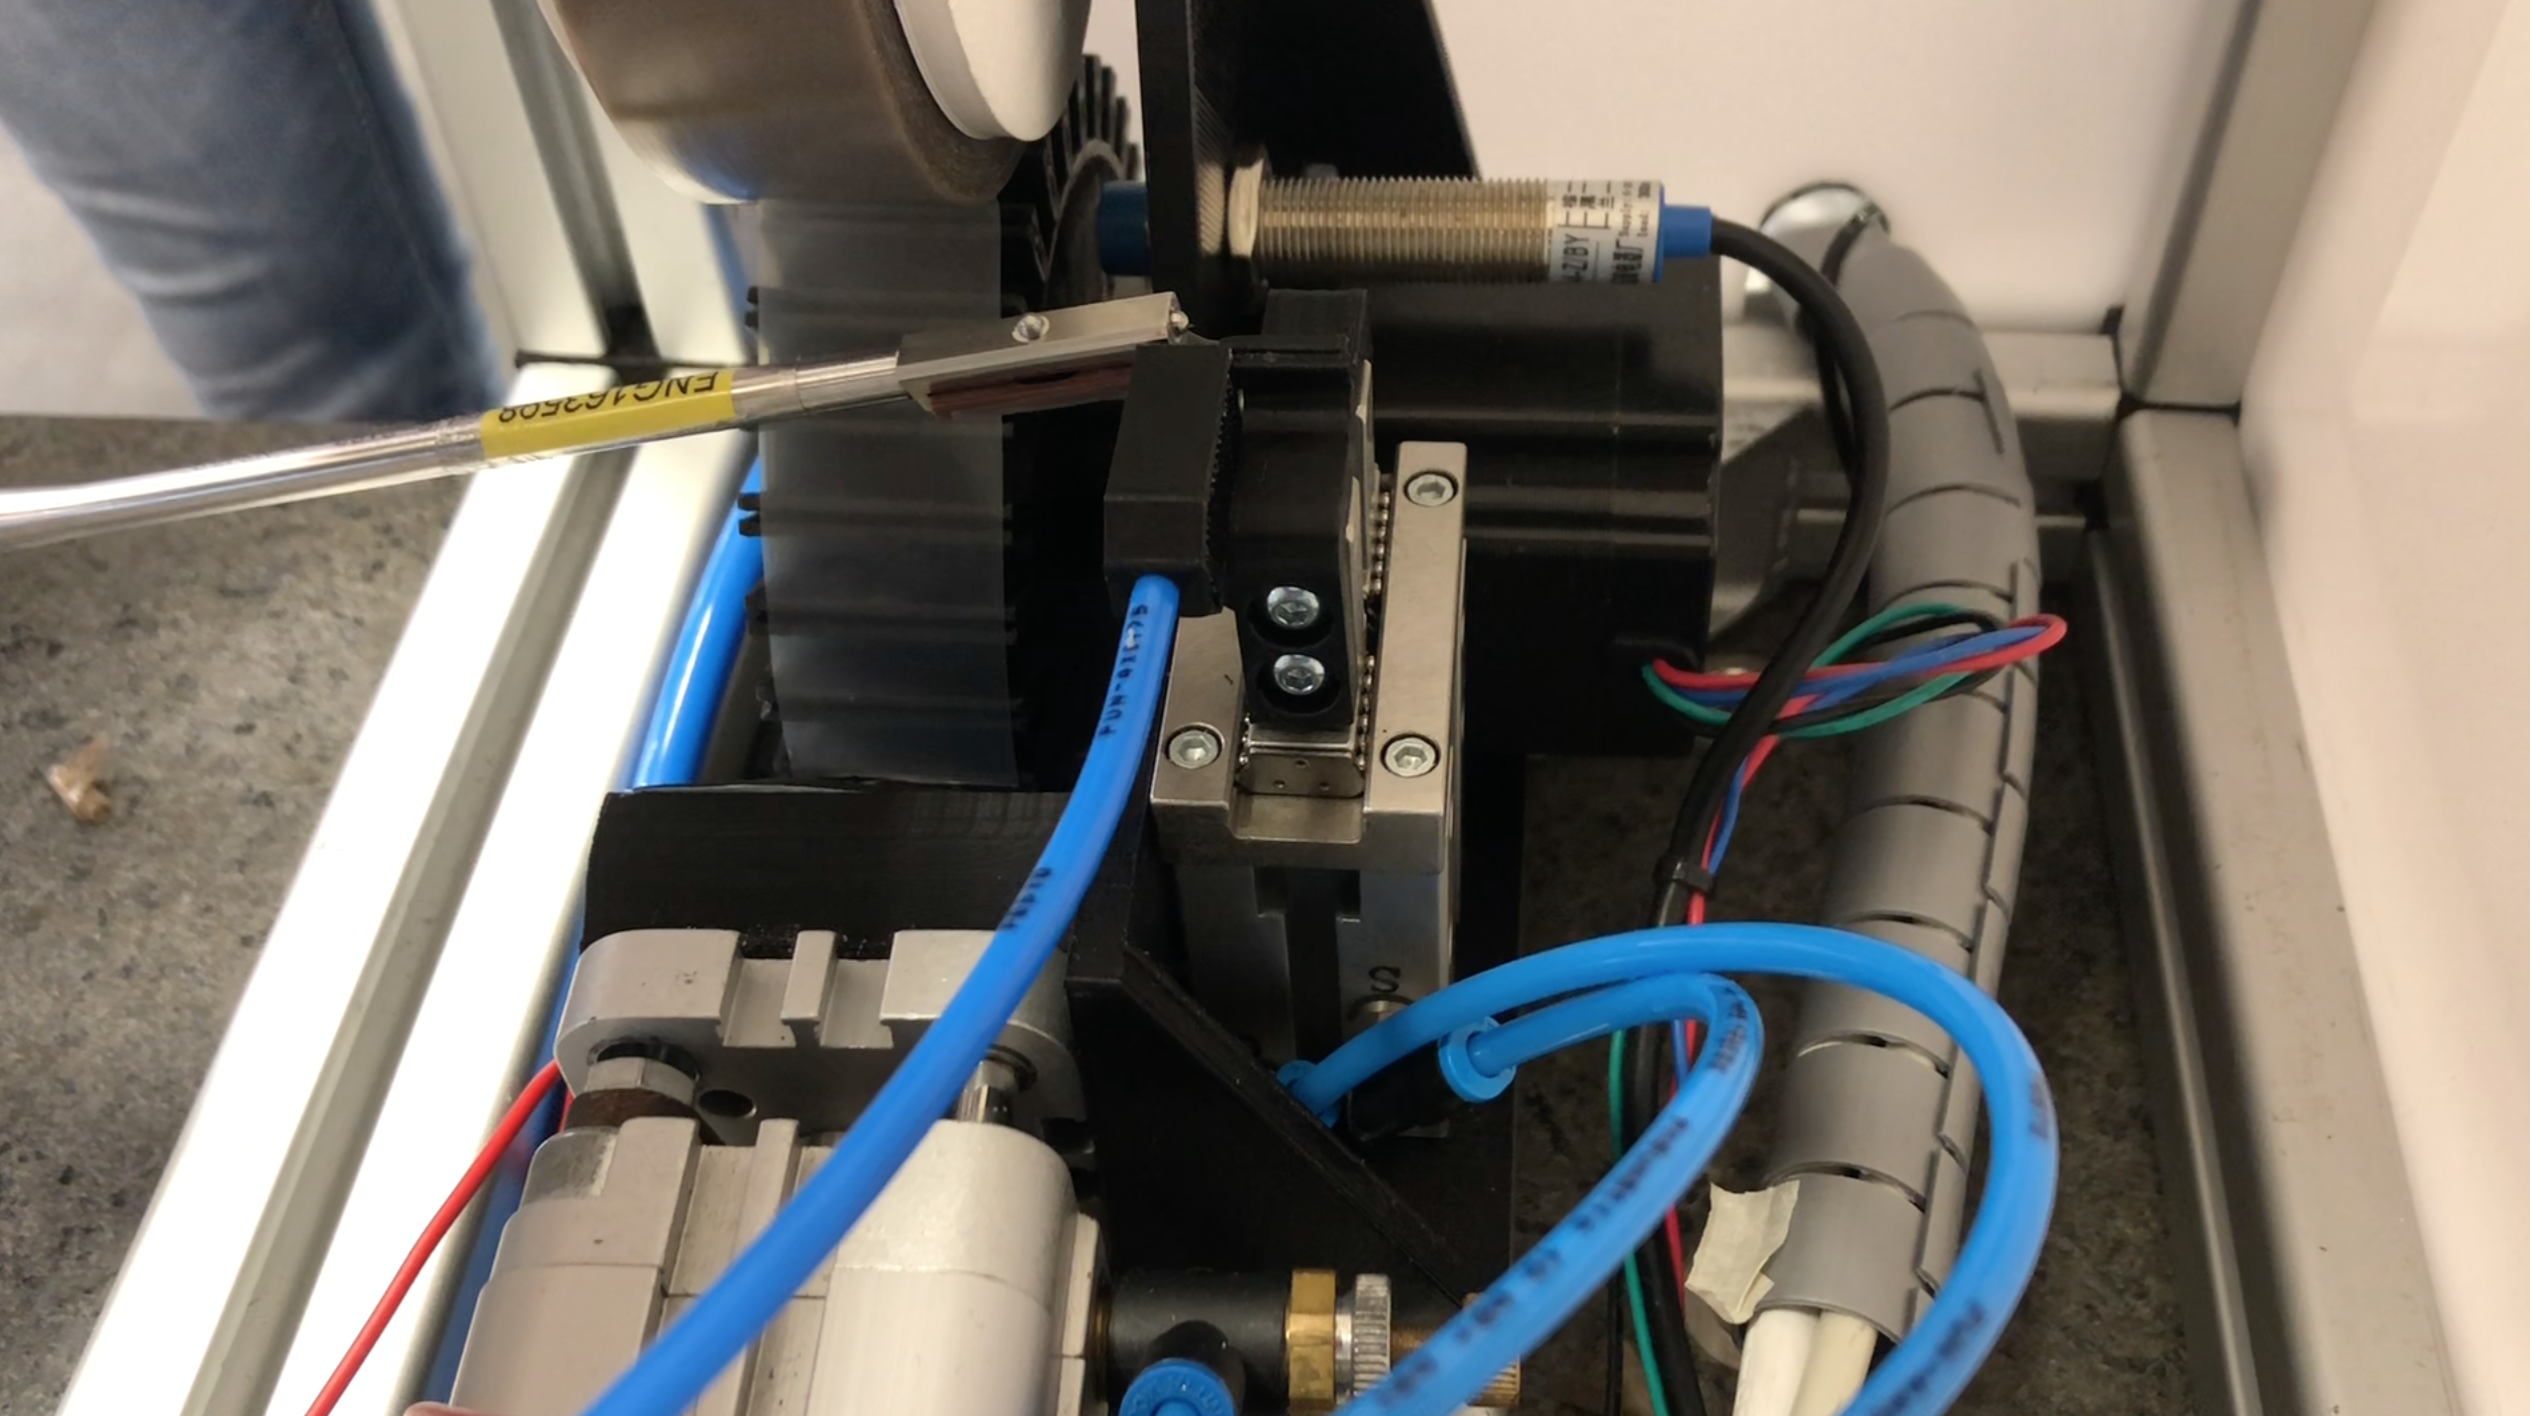
Figure 5: Tape removal
Vision check
Visual human inspection after tape placement would be lost, because of the automation of the tape placement and removal process. This inspection is important, to make sure that the tape is properly attached and removed. So, vision has been applied to make the process fully automated and more flawless. The visionbox is a 3D-printed box with a Logitech webcam and LED light in it. The box is controlled by a Python program. This system executes an inspection after tape placement and tape removal. The vision system checks the presence of the following aspects:
- Probe
- Tape
- Bubbles
- Flap
- Side flaps
A signal (approved/rejected) is sent for each check. The robot gets a go if all checks return an approved-signal. Else, a different action is performed depending on the rejection.
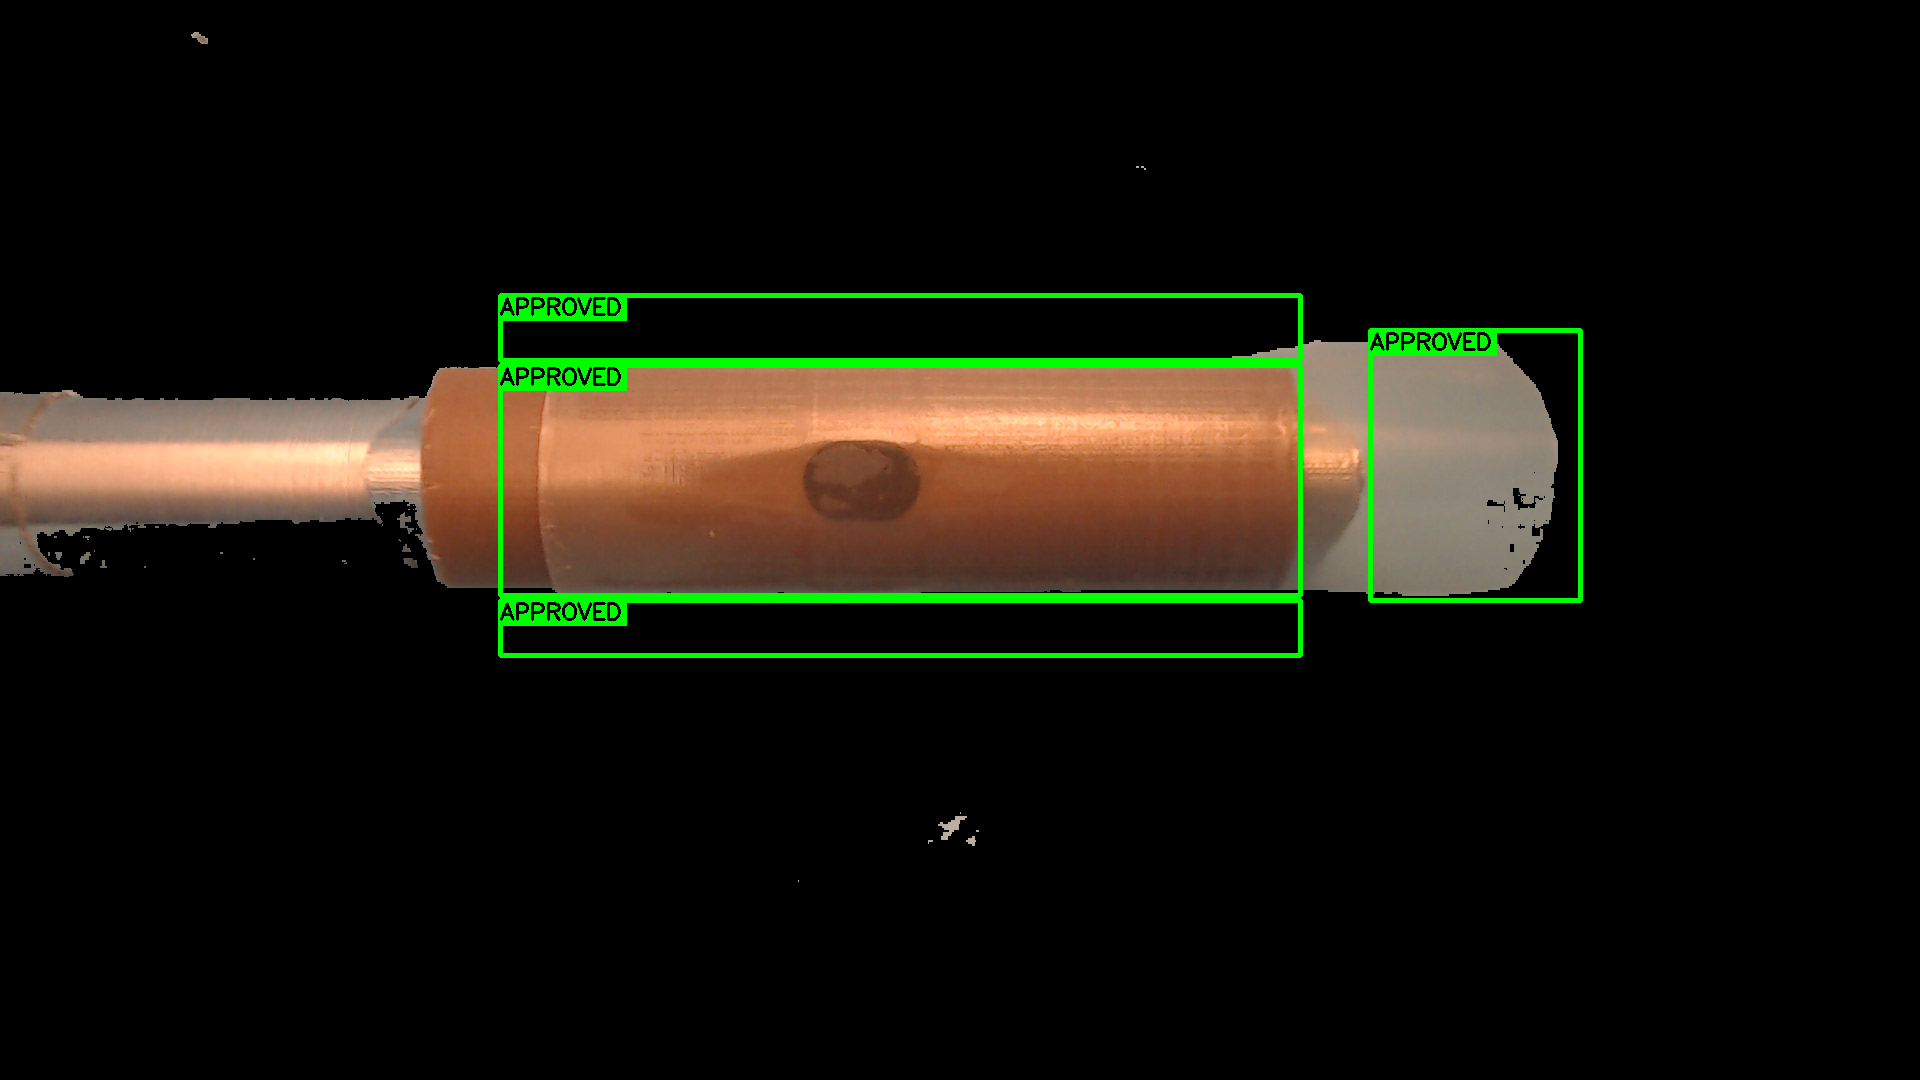
Figure 6: Vision check
Conclusion
The conclusion of the team is that this product meets all the requirements of the customer and has some extras. The assignment was that the team would build a product that could replace the tape on the eddy current probe, but the team did not just make the product – they also integrated it with a robot to show that it was working great. The team also integrated a vision set up to check if the tape was correctly applied. The team consist out of three mechanical engineers and one ICT student, so it was quite a big leap to programming all these different subsystems. The team really learned a lot of useful program skills they could utilize in upcoming projects.
Epilogue
The team wants to thank Marco van Es and Rik Vernooij from KLM engine services. The team also wants to thank the supervisors for their help, especially Thijs Brilleman and Mathijs van der Vegt. The team wants to thank them for their advice and help during the assignment.