About the company
“Assemblage perfect” is a local workshop in Duiven, a small town next to Arnhem, run by mr. Peter de Dreu. In this workshop they do various engineering tasks for companies from the neighborhood. It could be said that Assemblage Perfect is the friendly neighborhood engineering workshop, companies can ask for favors or have projects running in their workshop.
To keep up with the increasing amount of work and be more time efficient, Mr. de Dreu implemented a UR5 robot in his workshop. The robot is placed on a trolley and moved around to a variety of workstations when necessary. For now, the robot arm is used for simple and repetitive tasks of which the movement can be taught to the robot easily.
The challenge
Assemblage perfect makes a series of “Kijkglaasjes” or monitoring glasses that serve as a window to check on the pilot flame of a heater or stove. All of the components of the “Kijkglas” arrive in boxes, unorganized. There are three different components that need to be assembled: Aluminum frame, Vilt (foam) and a glass.
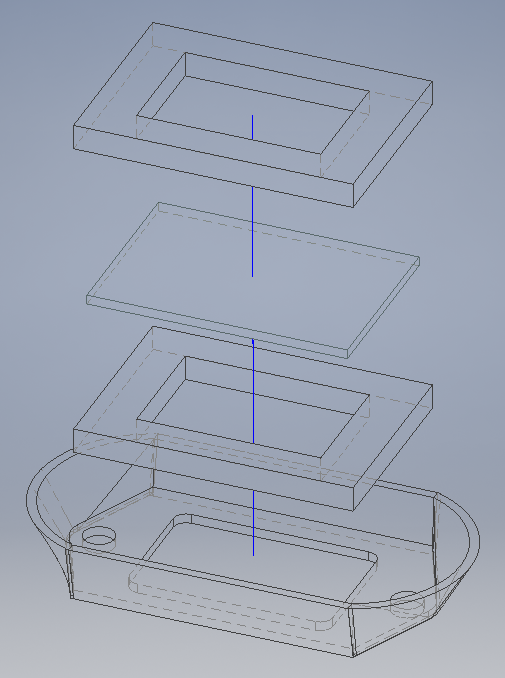
The task is to automate the assembly and gluing process of these components, sandwich the glass in vilt and glue it on the aluminum frame (fig. 1).
This means that there are a multitude of actions required to complete the assembly; Picking up each of the products and gluing and placing them in a designated box after assembly.
Because each of the products is made from a different material and has different dimensions, specialized grippers are necessary for the products.
Part of this challenge is that vision or other more expensive sensory devices are not to be used. All of the positioning of the robot arm and localizing of objects needs to be solved in a different way.
Various systems are implemented to solve this challenge.
Robot arm positioning
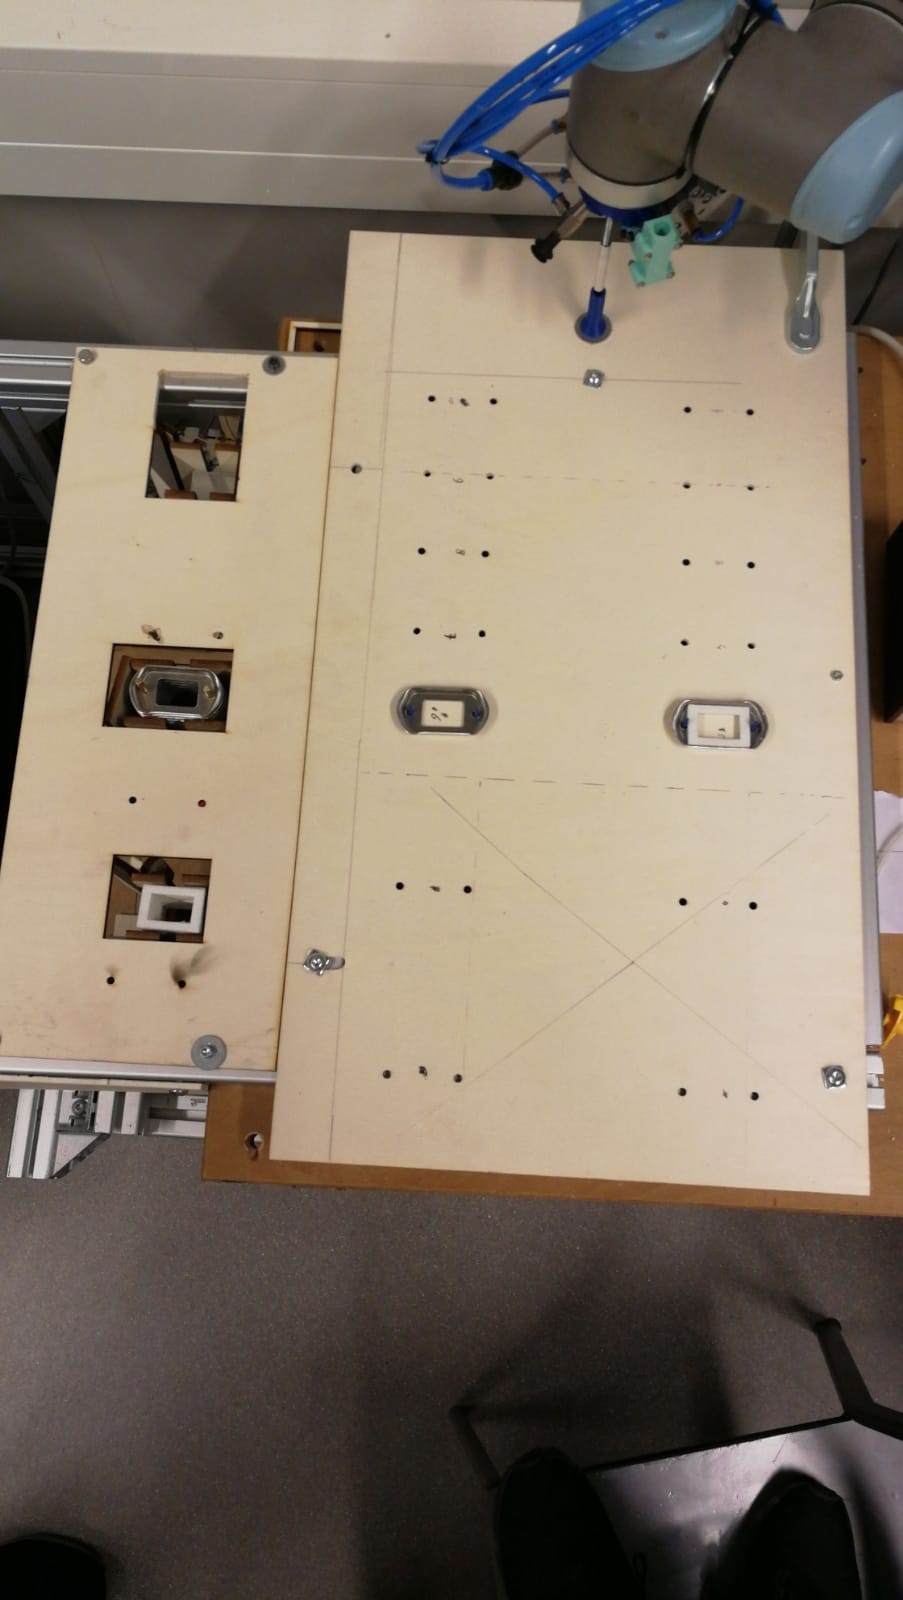
To perform various operations this system needs some sort of way to make sure where the arm itself is
positioned relative to the objects it needs to interact with. The positioning is solved quite easily by making a work plane and a zero-point on it. On this zero point, a uniquely shaped cylinder with a counterpart that fits in it was implemented. Everything else is made in a predetermined off-set from the zero-point. This way the robot can be moved but the work plane will always remain consistent.
The calibration action will be performed by hand before the program starts. The counterpart of the calibration tool is assembled on the robot
and will need to be put in the cylinder manually. This assures a good alignment on each axis without implementing vision or other sensory solutions.
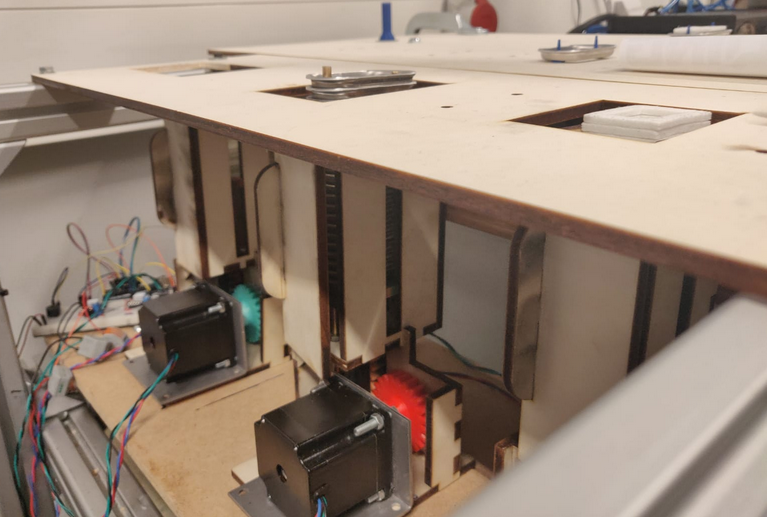
Buffer system
The robotic arm needs an organized feed of input (products). A buffer system has been implemented to solve the problem of unorganized inflow. The products will be dispensed by an integrated Arduino system. The system is pulsed digitally by the robot, so it dispenses products when necessary.
The design was a very iterative process and it took many tries to come to the final product that is being implemented now. Only after all of the end-of-arm-tools were finished it was apparent that the buffer system should not be on top of the work plane because the bulky EOAT required as much free space as possible.
The buffer system for each of the products works on the same principle. A stepper motor is driving a platform up with high precision. This way it was possible to standardize the positions of the products accurately.
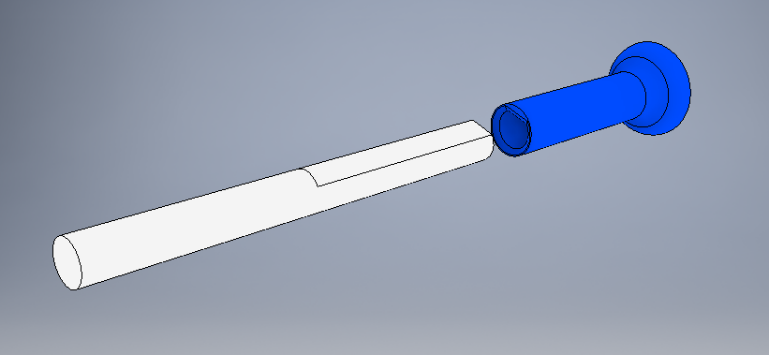
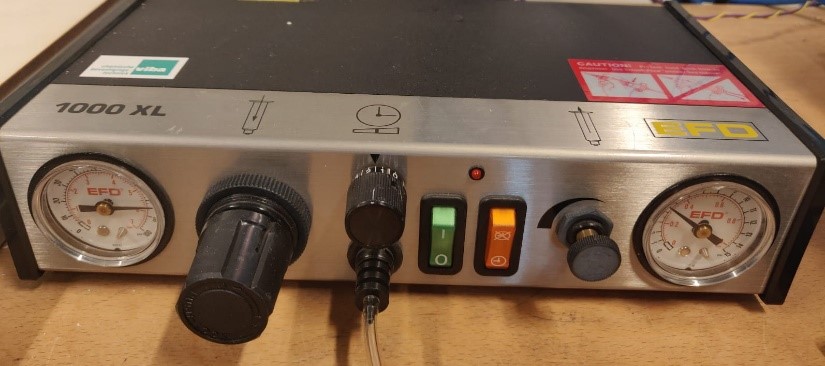
Glue dispenser
The glue dispensing system relies heavily on a pressure regulator. The syringe is connected with a tube to the pressure regulator which can be adjusted to dispense a wide variety of liquids in a very precise manner. However the regulator is made for manual use and comes with a pedal. This pedal is completely replaced by a self-made connection and switch so that the robot is able to communicate with the pressure regulator directly.
End Of Arm Tools
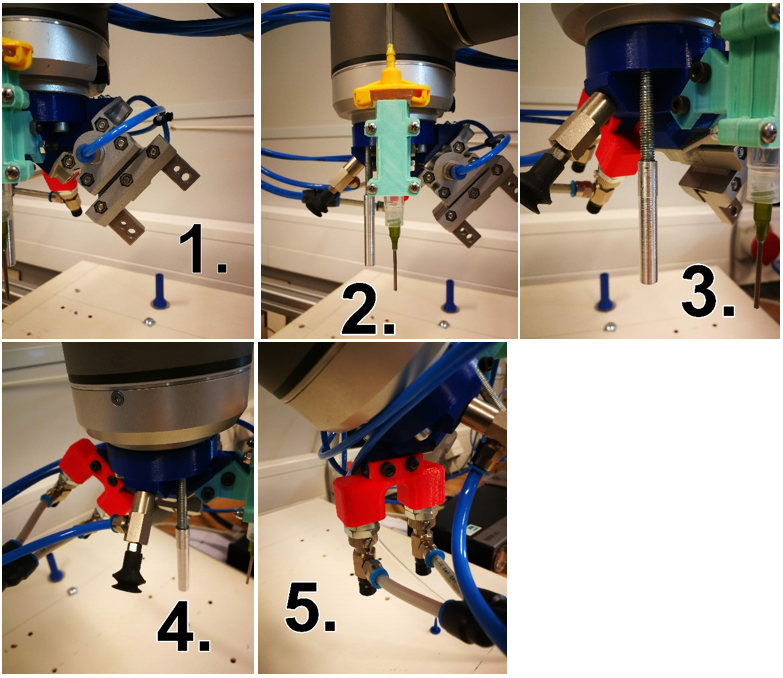
To perform each of the actions 5 different End Of Arm Tools have been implemented.
- A pneumatic parallel gripper to grip the Aluminum frames
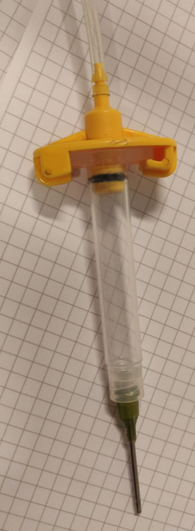
- The glue dispenser holder and syringe
- The calibration tool
- A suction cup to grip the Glass
- Two smaller suction cups to grip the Foam
All of the Tools are assembled on a 3D printed mount on the robot arm. The mount’s design accounts for each of the tools’ sizes and working spaces so that all of the tools can be used with a simple rotation of the robot arm without getting in the way of other tools.
Solution
The final solution is a system that can be prepared and calibrated manually, but function autonomously. It can pick up any of the products, assemble and glue them. Because the cycle time of each assembly is known precisely it is fairly simple to calculate how long it will take the robot to run out of buffer material. If any of the buffers are empty, the system will sound an alarm to alert people.
Instead of spending several hours of manual labor to assemble the monitoring glasses, “Assemblage Perfect” can now spend a few minutes of preparation time and leave the repetitive work to the robot.