Introduction
Metazet Formflex b.v. is mainly a metalworking factory. One of the products they produce is a mudguard for all kinds of electricly driven carts. Metal sheets are bent to certain forms and seams have to then be welded together which creates welded seams. The finish of these seams is not the end result they are looking for so they then grind the seams to make the surface flush. This process is very labor intensive and Metazet has applied to the Smart manufacturing & Robotics minor to find students who are interested in automating this process for them. So here Nick Botermans, Ryan Verbaan, Koen Brok and Job Hertog came in the picture as designated engineers to develop a solution for Metazet. In this article we will attempt to take you with us on our seven week journey working on-site.
The Challenges
Metazet found a challenge in automating the grinding process of welding seams. To succesfully grind a welding seam you will have to develop a way to secure all the parts involved in place, you will have find to a suitable robot for this application, you will have to find the right tools to grind which will also be compatible with the robot, you will have to find a way to visualize the environment and process this in your program and last but not least you will have to find a way to ensure the safety at all times.
Robot and tool
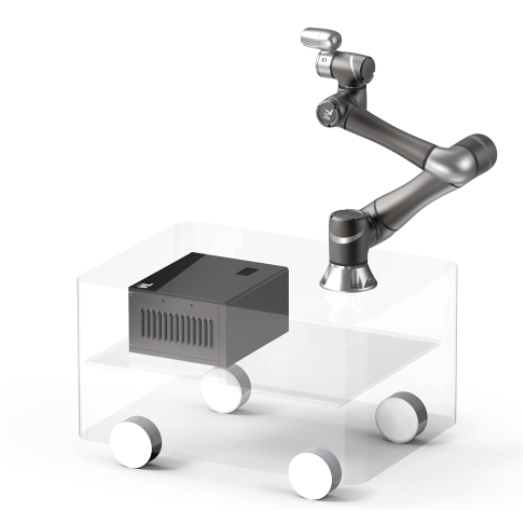
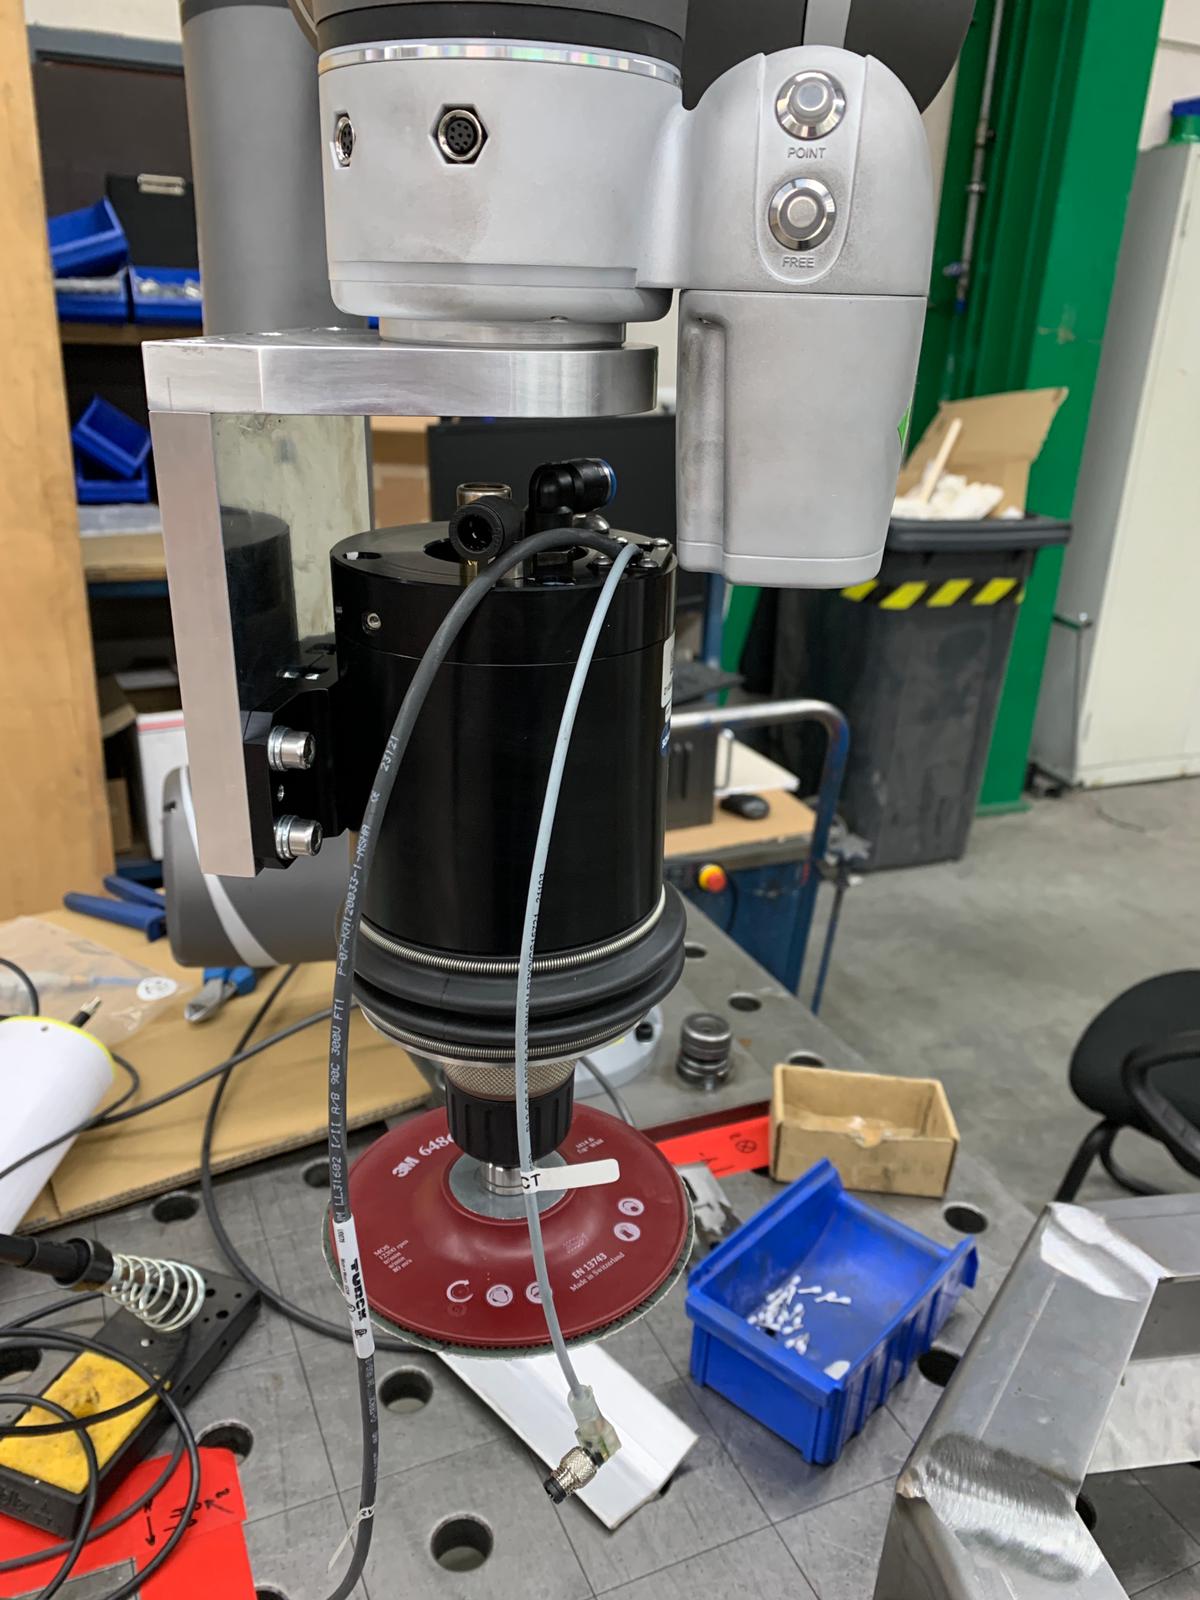
The robot and the end of arm tool have already been purchased by Metazet. They have been advised by TMrobot on what products to buy for this application. In this case it will be a Corobot and a pneumatic spindle. Below you can see some images of the robot and the tool. We will have to develop a way to mount and secure the robot.
Product clamping
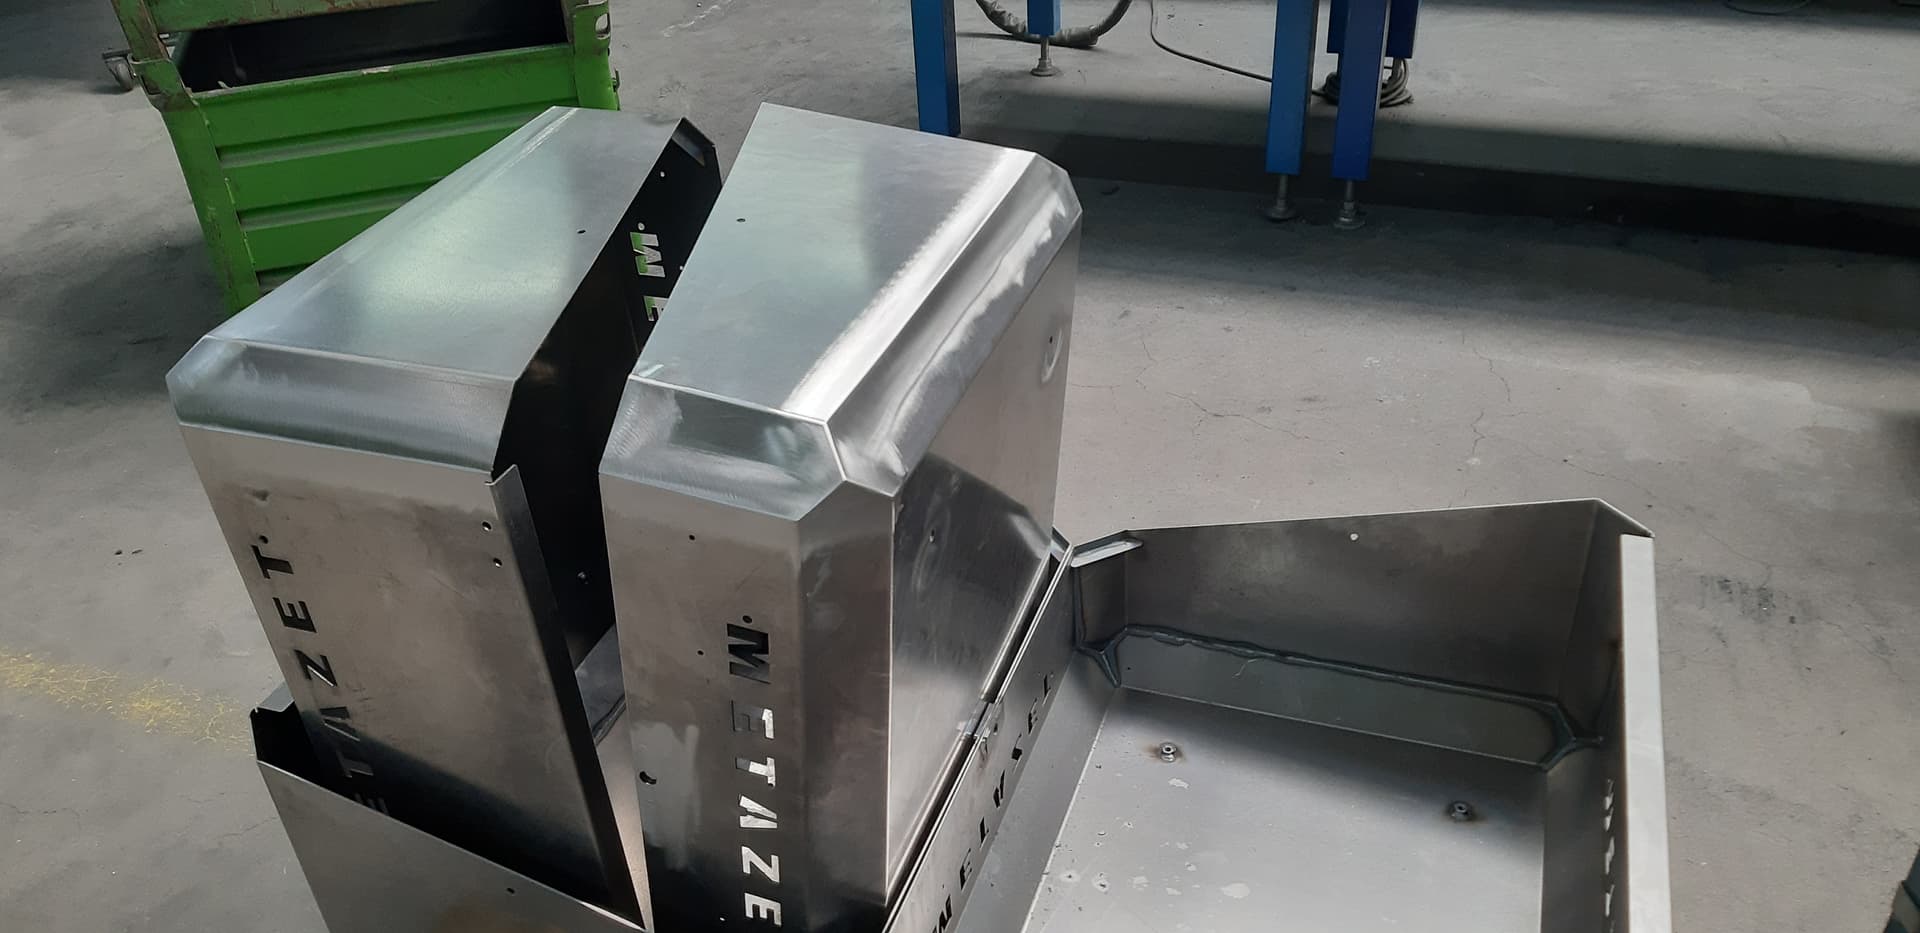
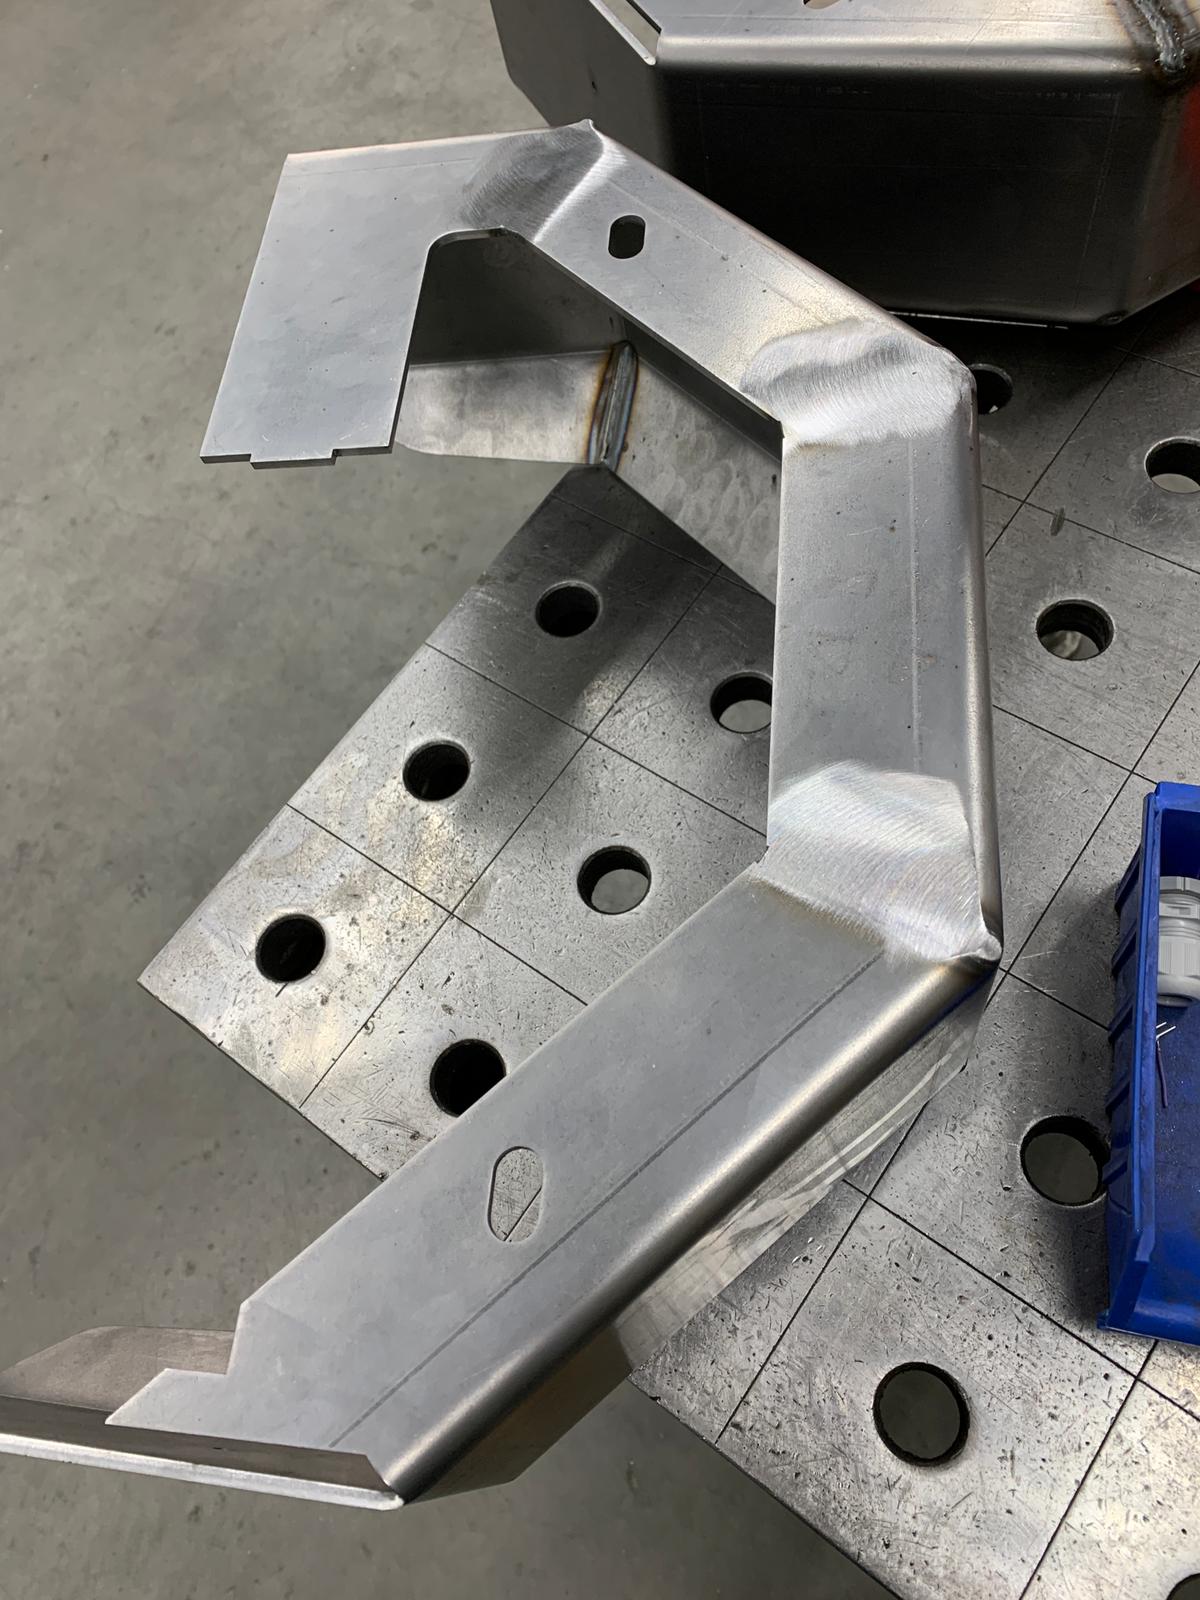
In the images below you can see some examples of products of which we’ll have to grind the welding seams from. As you’ll notice these product dimensions lie very much apart from one another and we will have to find a way to clamp as much different products as possible with the same clamper design.
Pneumatics
The end of arm tool is a pneumatic based tool and so a pneumatic system has to be developed for it. Metazet already has all the products we would need for this and otherwise they could order new products for us to use.
Electrics
Eventually we’ll have to create a UI which works with the written program. An electrical cabinet will have to be developed for this application. As well as the pneumatic parts Metazet already has all the parts we need for this.
Safety precautions
And lastly we will have to ensure the safety at all times. To do this we will have to think of safety parts of the program as well as hard wired safety functions and on top of that something like a physical barrier will be necessary, for the spindle with the grind tool on it can be ‘limb-loosing’ dangerous.
developed Solutions
Underneath you can find all the solutions we’ve developed for our challenges per subject.
Robot and tool
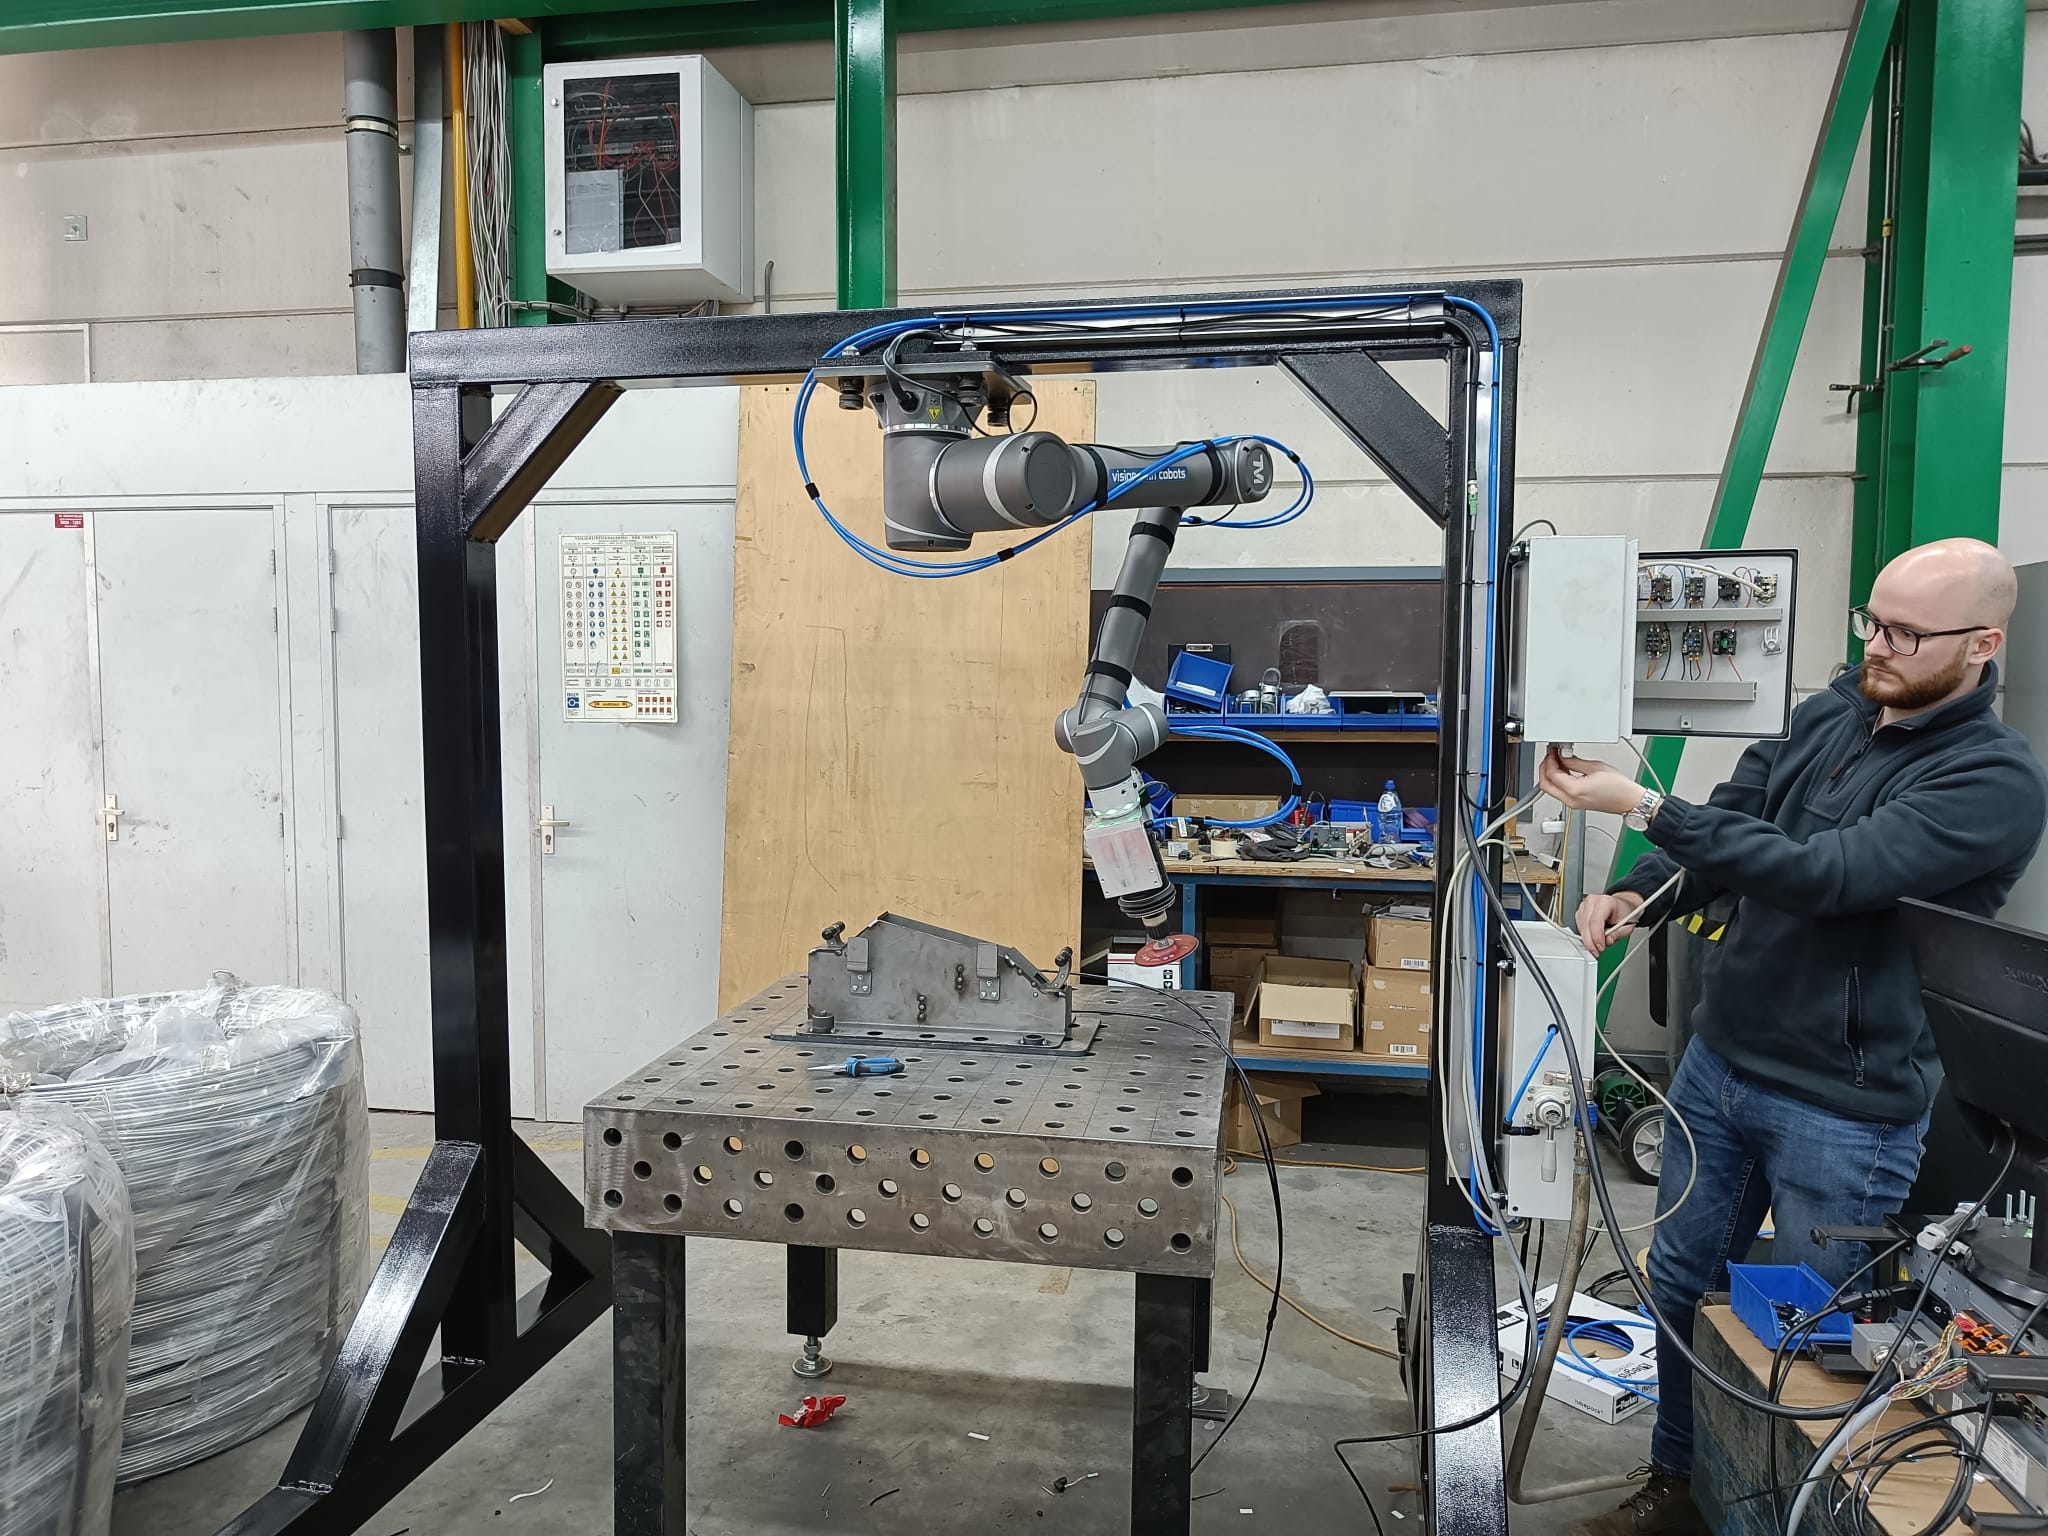
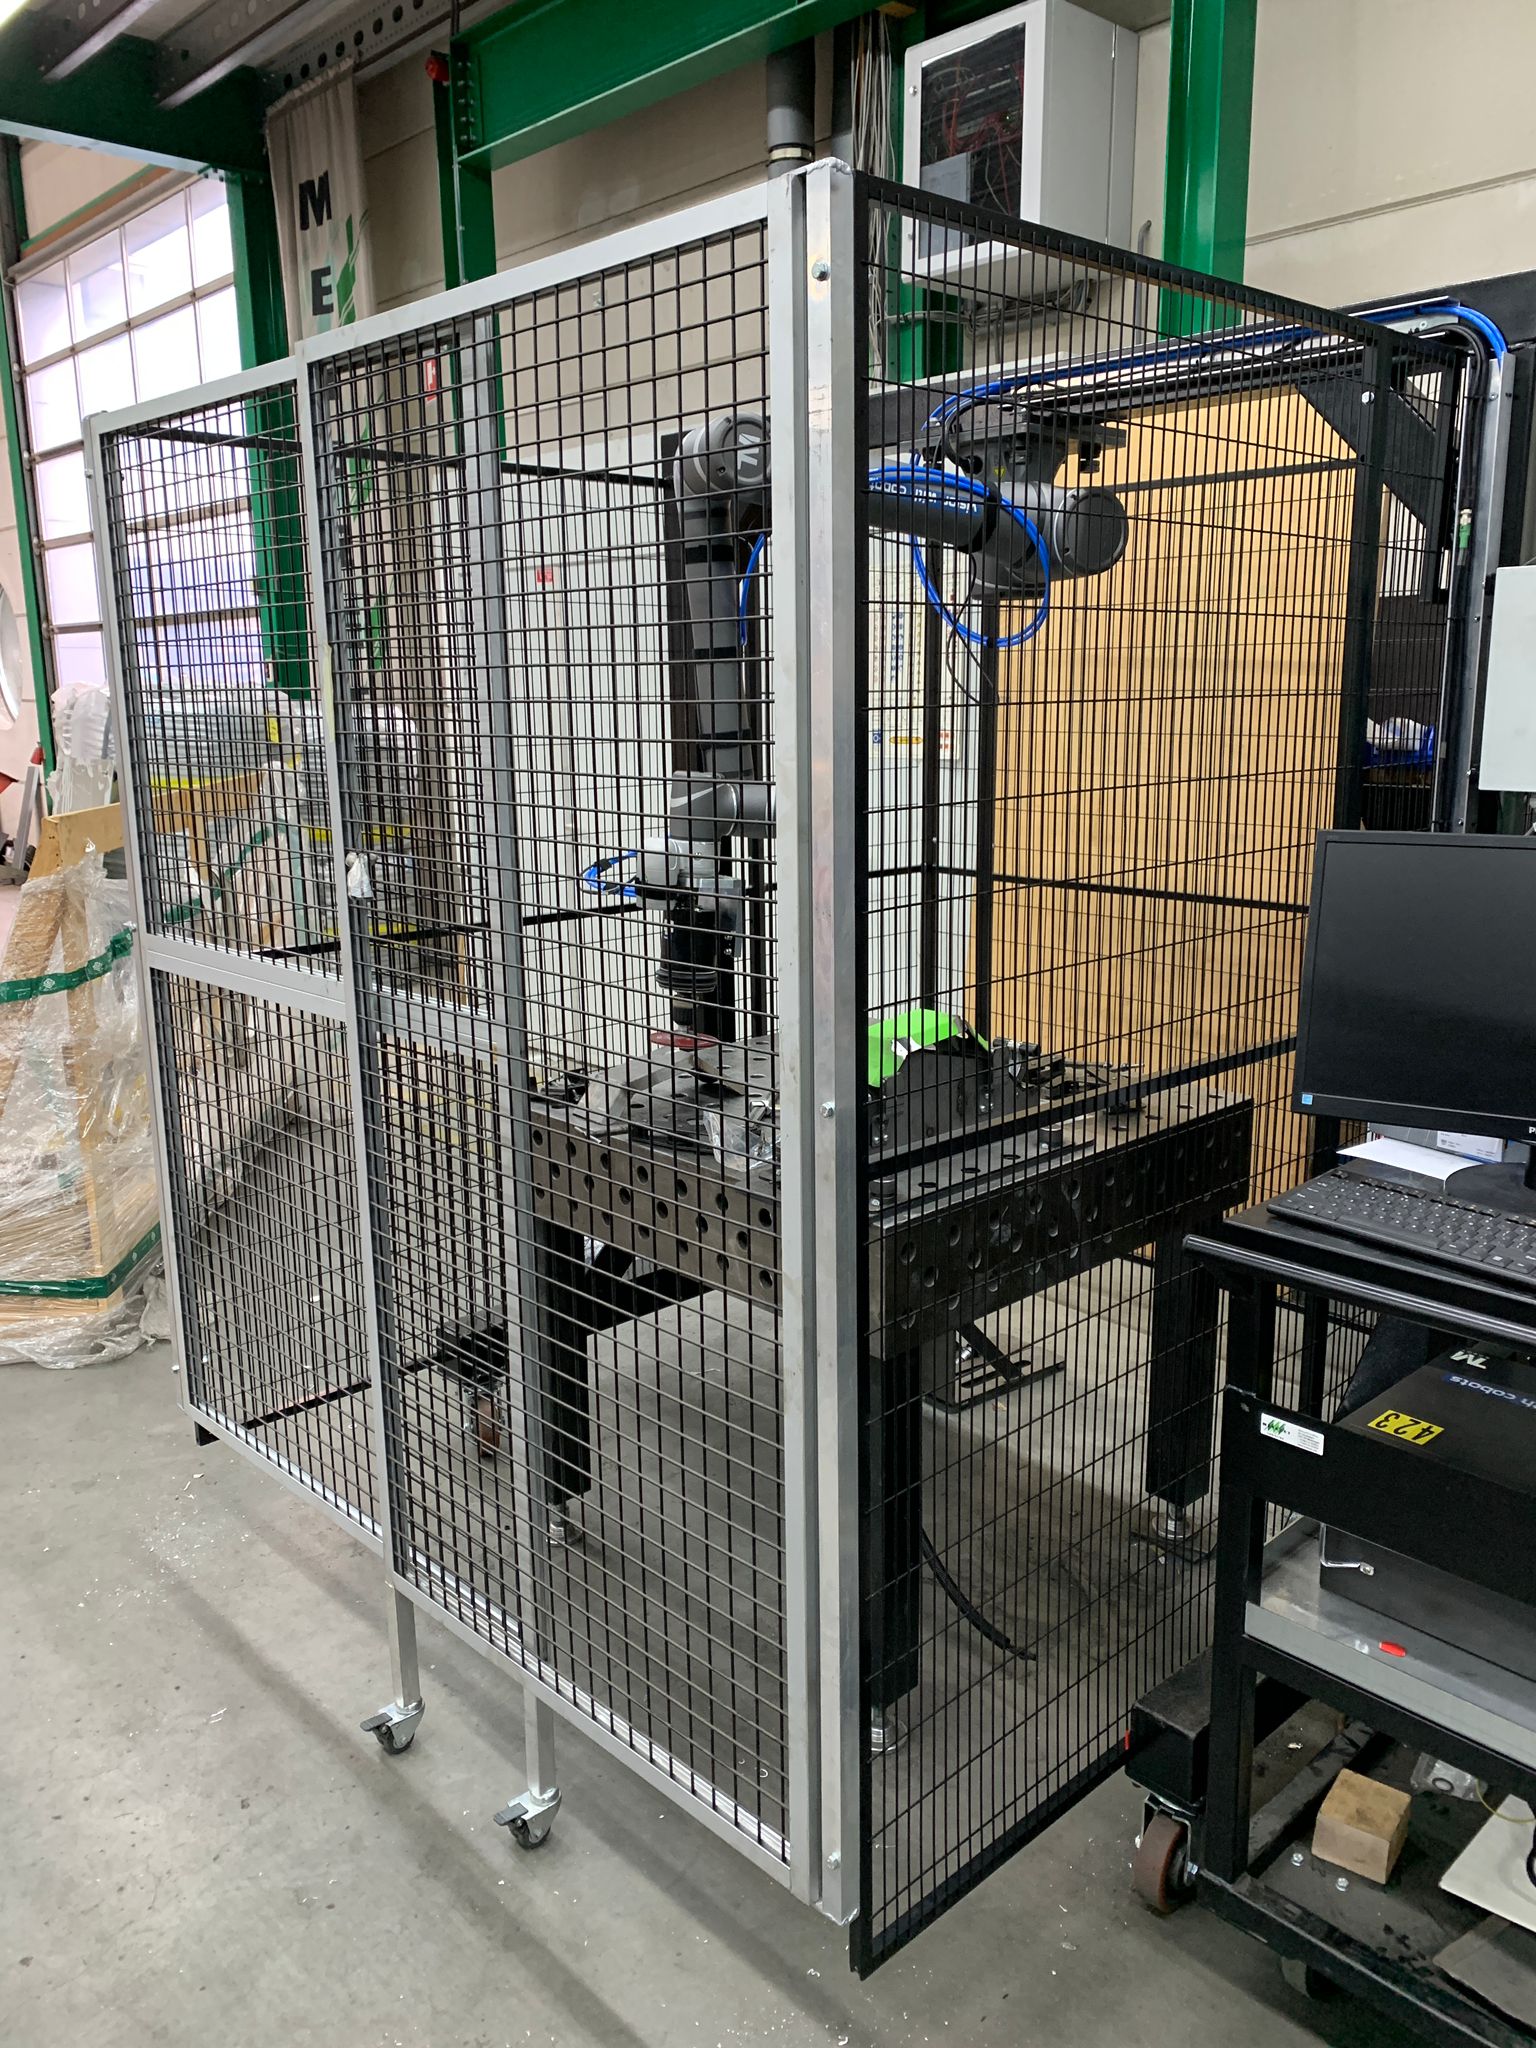
For the mounting of the robot we have developed a gantry. We decided to mount the robot upside-down so it’s work field would be larger. Underneith the portal we’ve placed a welding table on which you could mount almost anything you want. The image below shows the portal with the electrical and pneumatic cabinet already attatched to it. We developed this gantry in a way so the robot can be moved over different welding tables for example. We did this by adding wheels to the gantry and making sure it has an entrance and or exit point so it can be driven over a table.
Product clamping
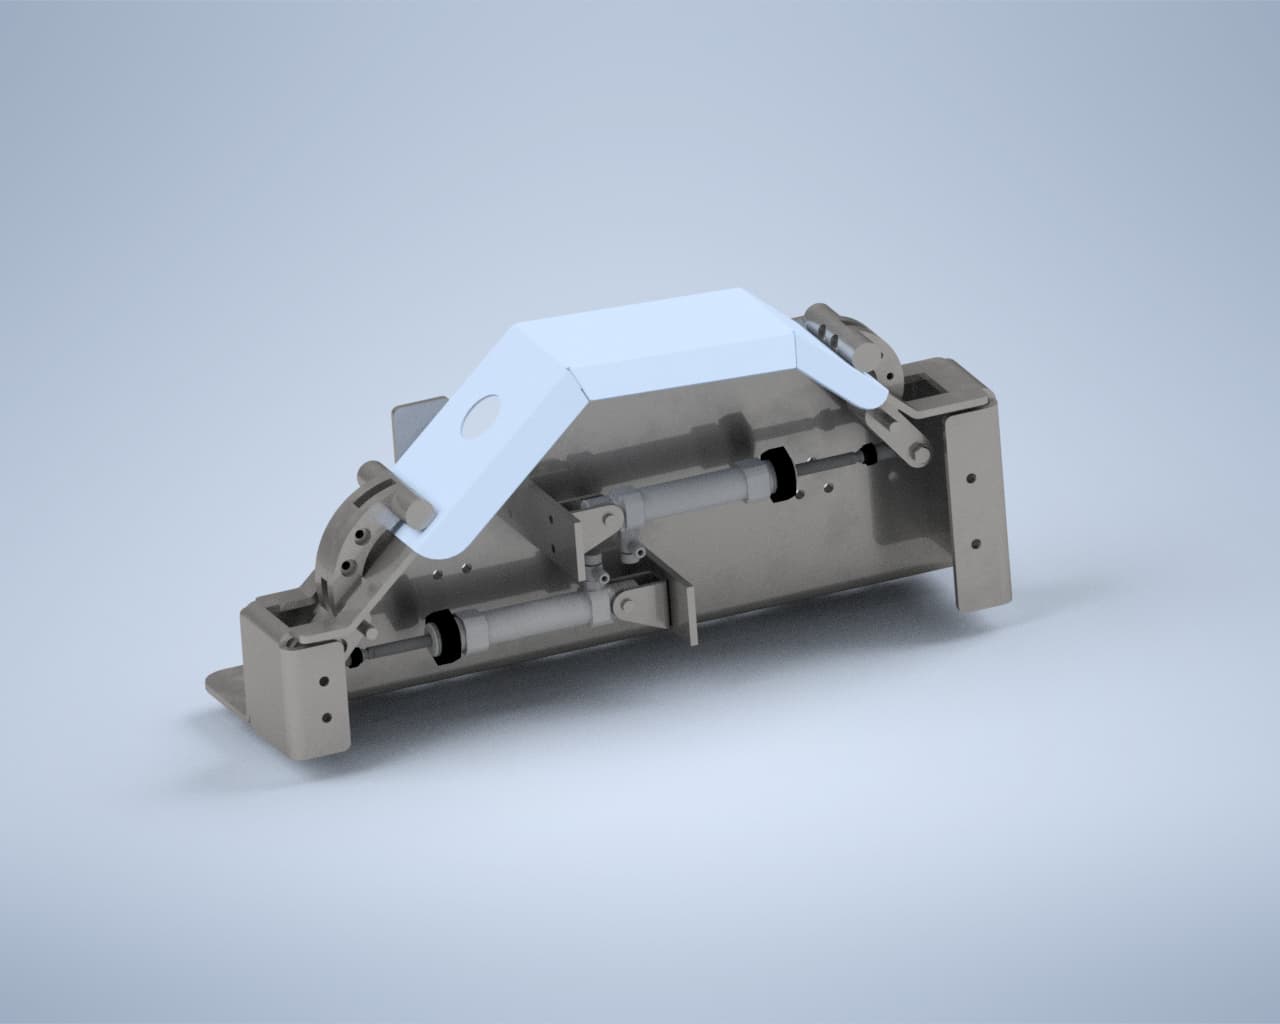
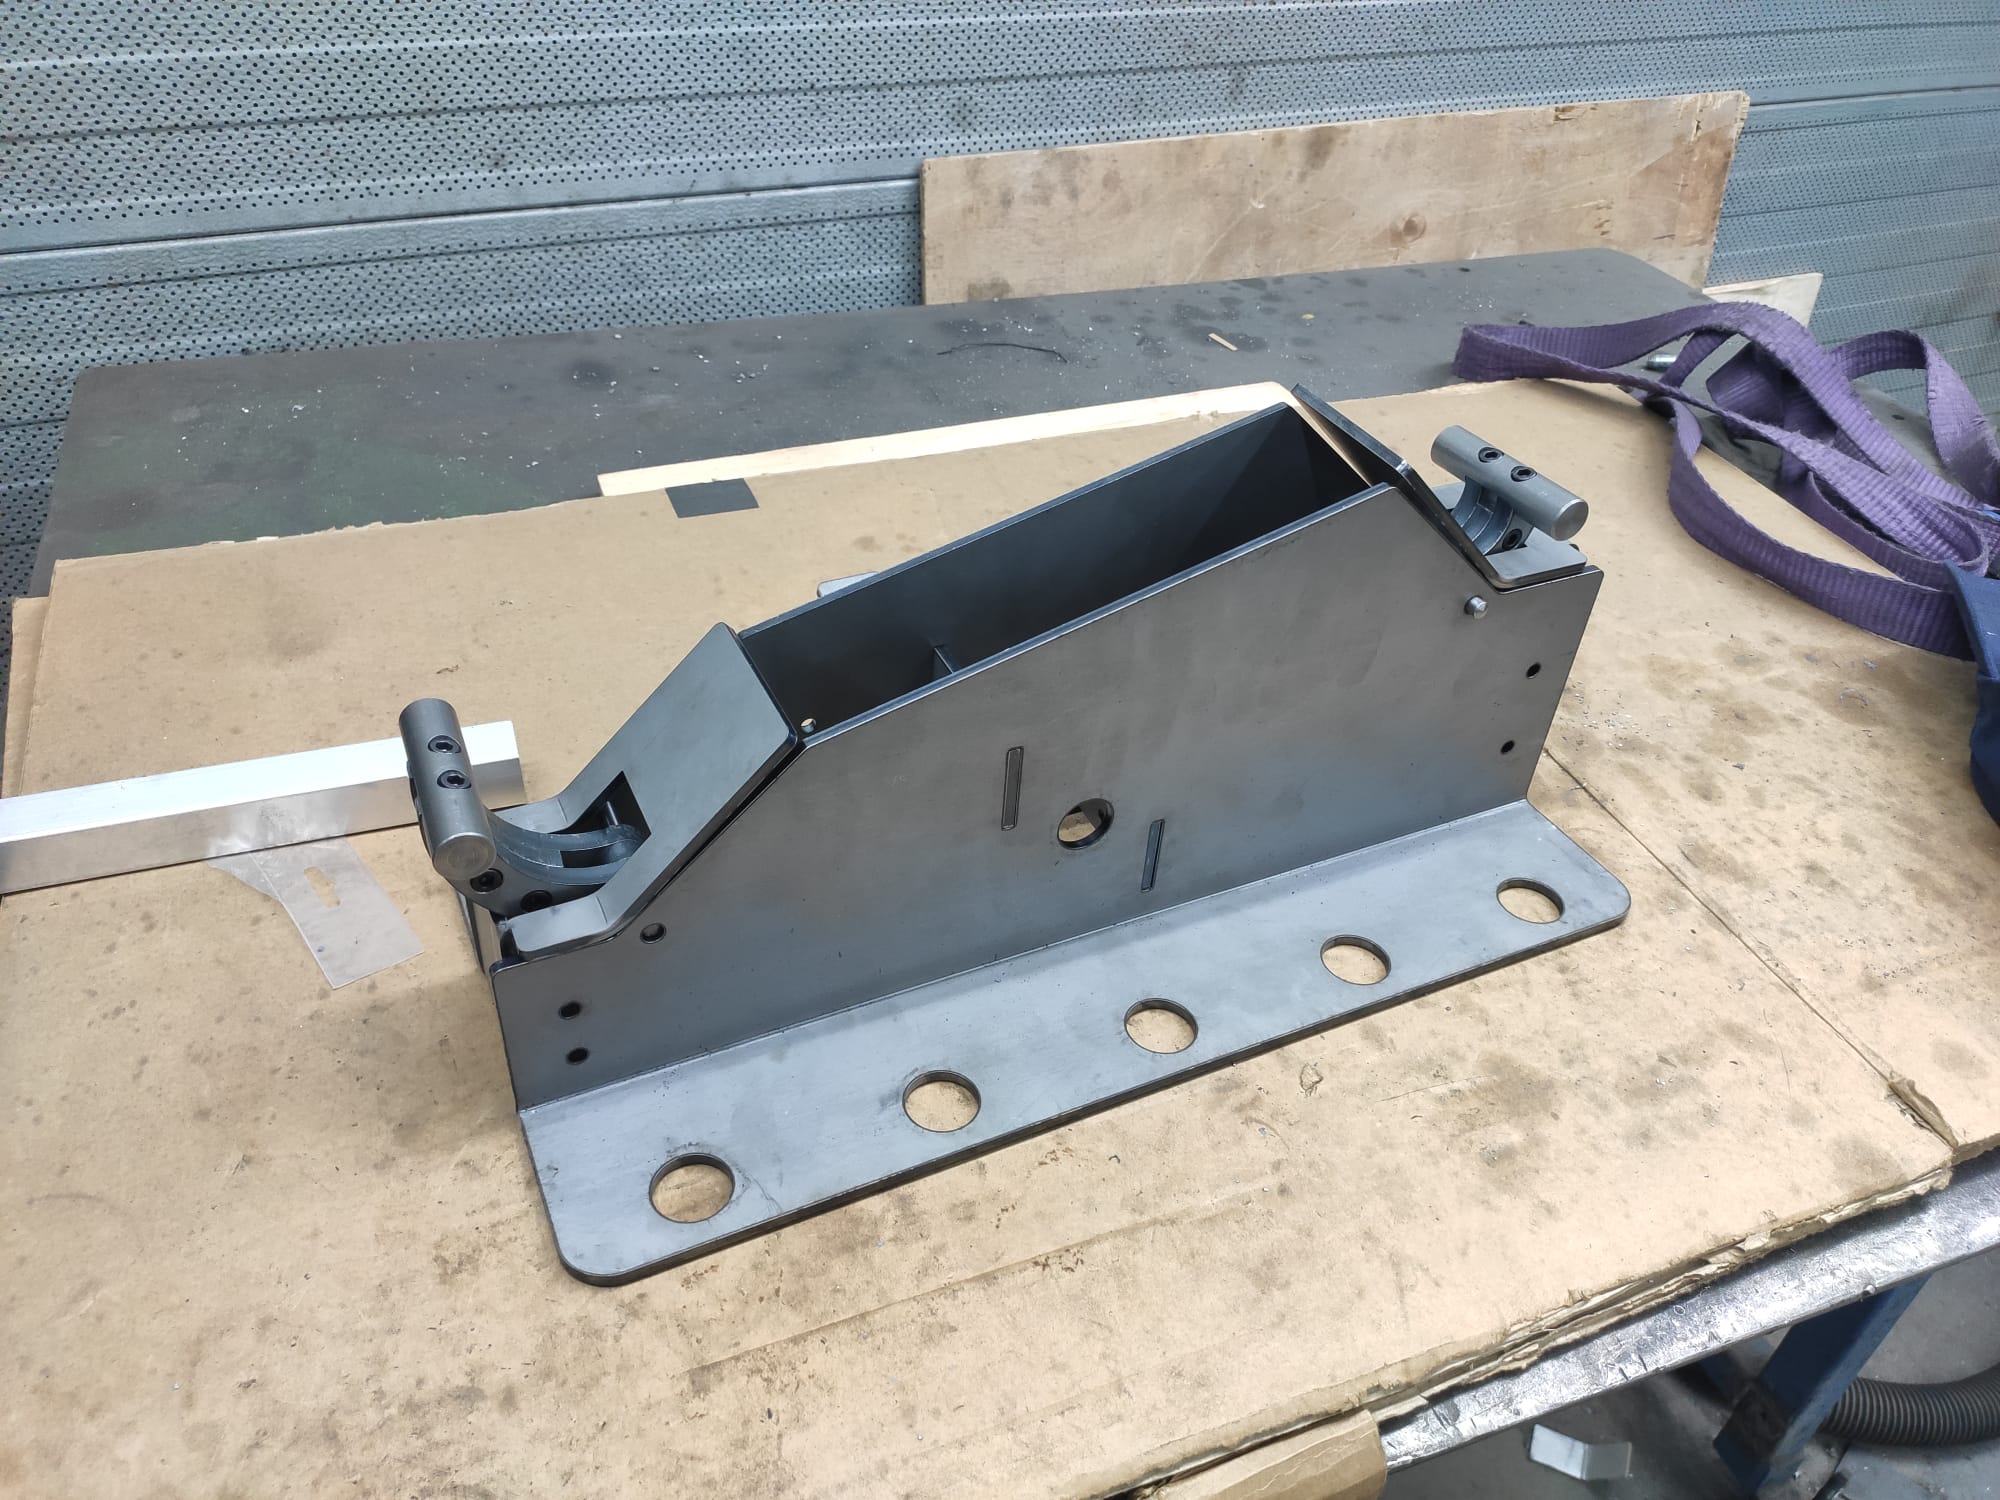
There are two types of products we have to grind. One kind is the mudguards and the other kind is covers or cases (square or rectangular like). In total there are twelve different products to grind that fit into these two categories. We’ve decided to give the mudguards priority because these have the highest production numbers. We have developed two clampers, one clamper can clamp all the square and rectangular like products and the other clamper is specially designed for the ‘odd-shaped’ small mudguards. We used pneumatic actuators to clamp the mudguards because the pressured air was available anyway due to the need for it for the spindle. Below you can see our final clamper for the mudguards. In the youtube video at the top of this page you will see how it works.
Pneumatics
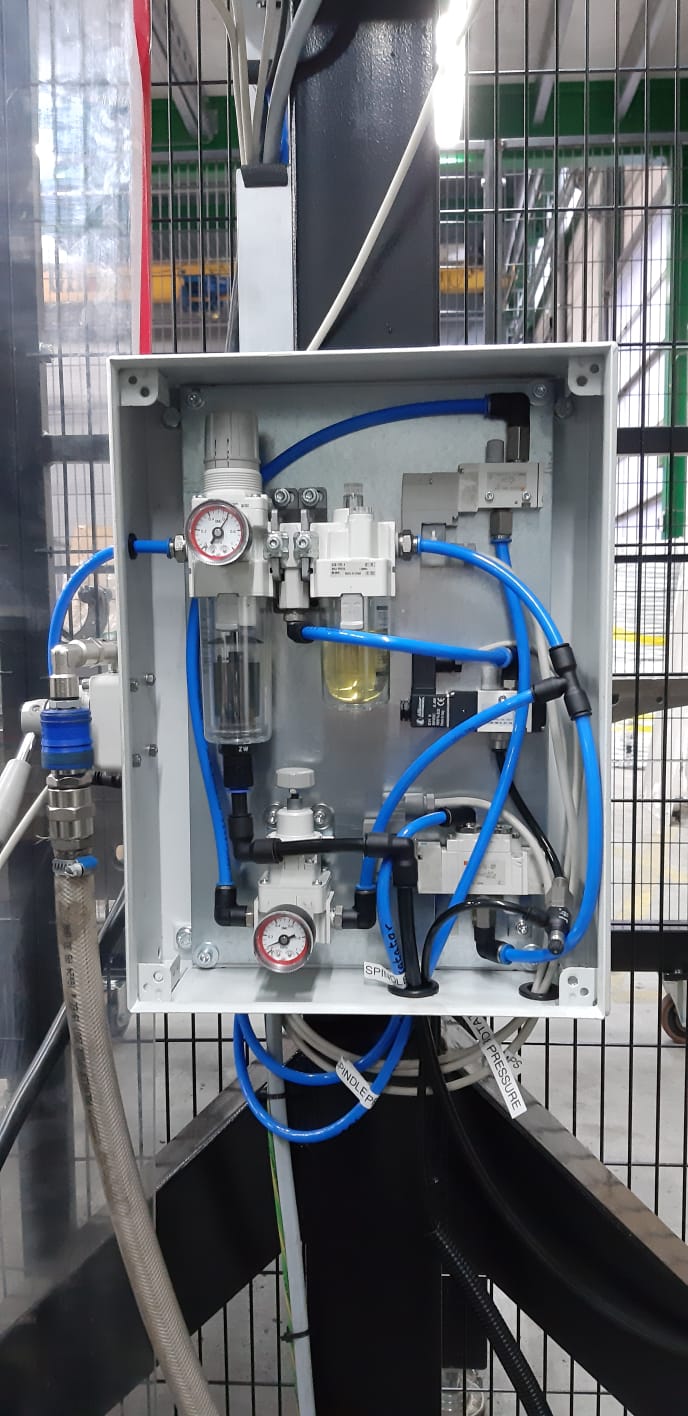
Below you can see an image of our pneumatic cabinet. We had to use two different regulators because we need two different pressures in the system. One of these pressures has to contain lubricated air as well. The solenoid valves are controlled by the electrical circuit which will be explained in the next paragraph. Also with the use of relays we’ve secured a way to cut of all the pressured air in emergency situations. This will also be further explained in the next paragraph.
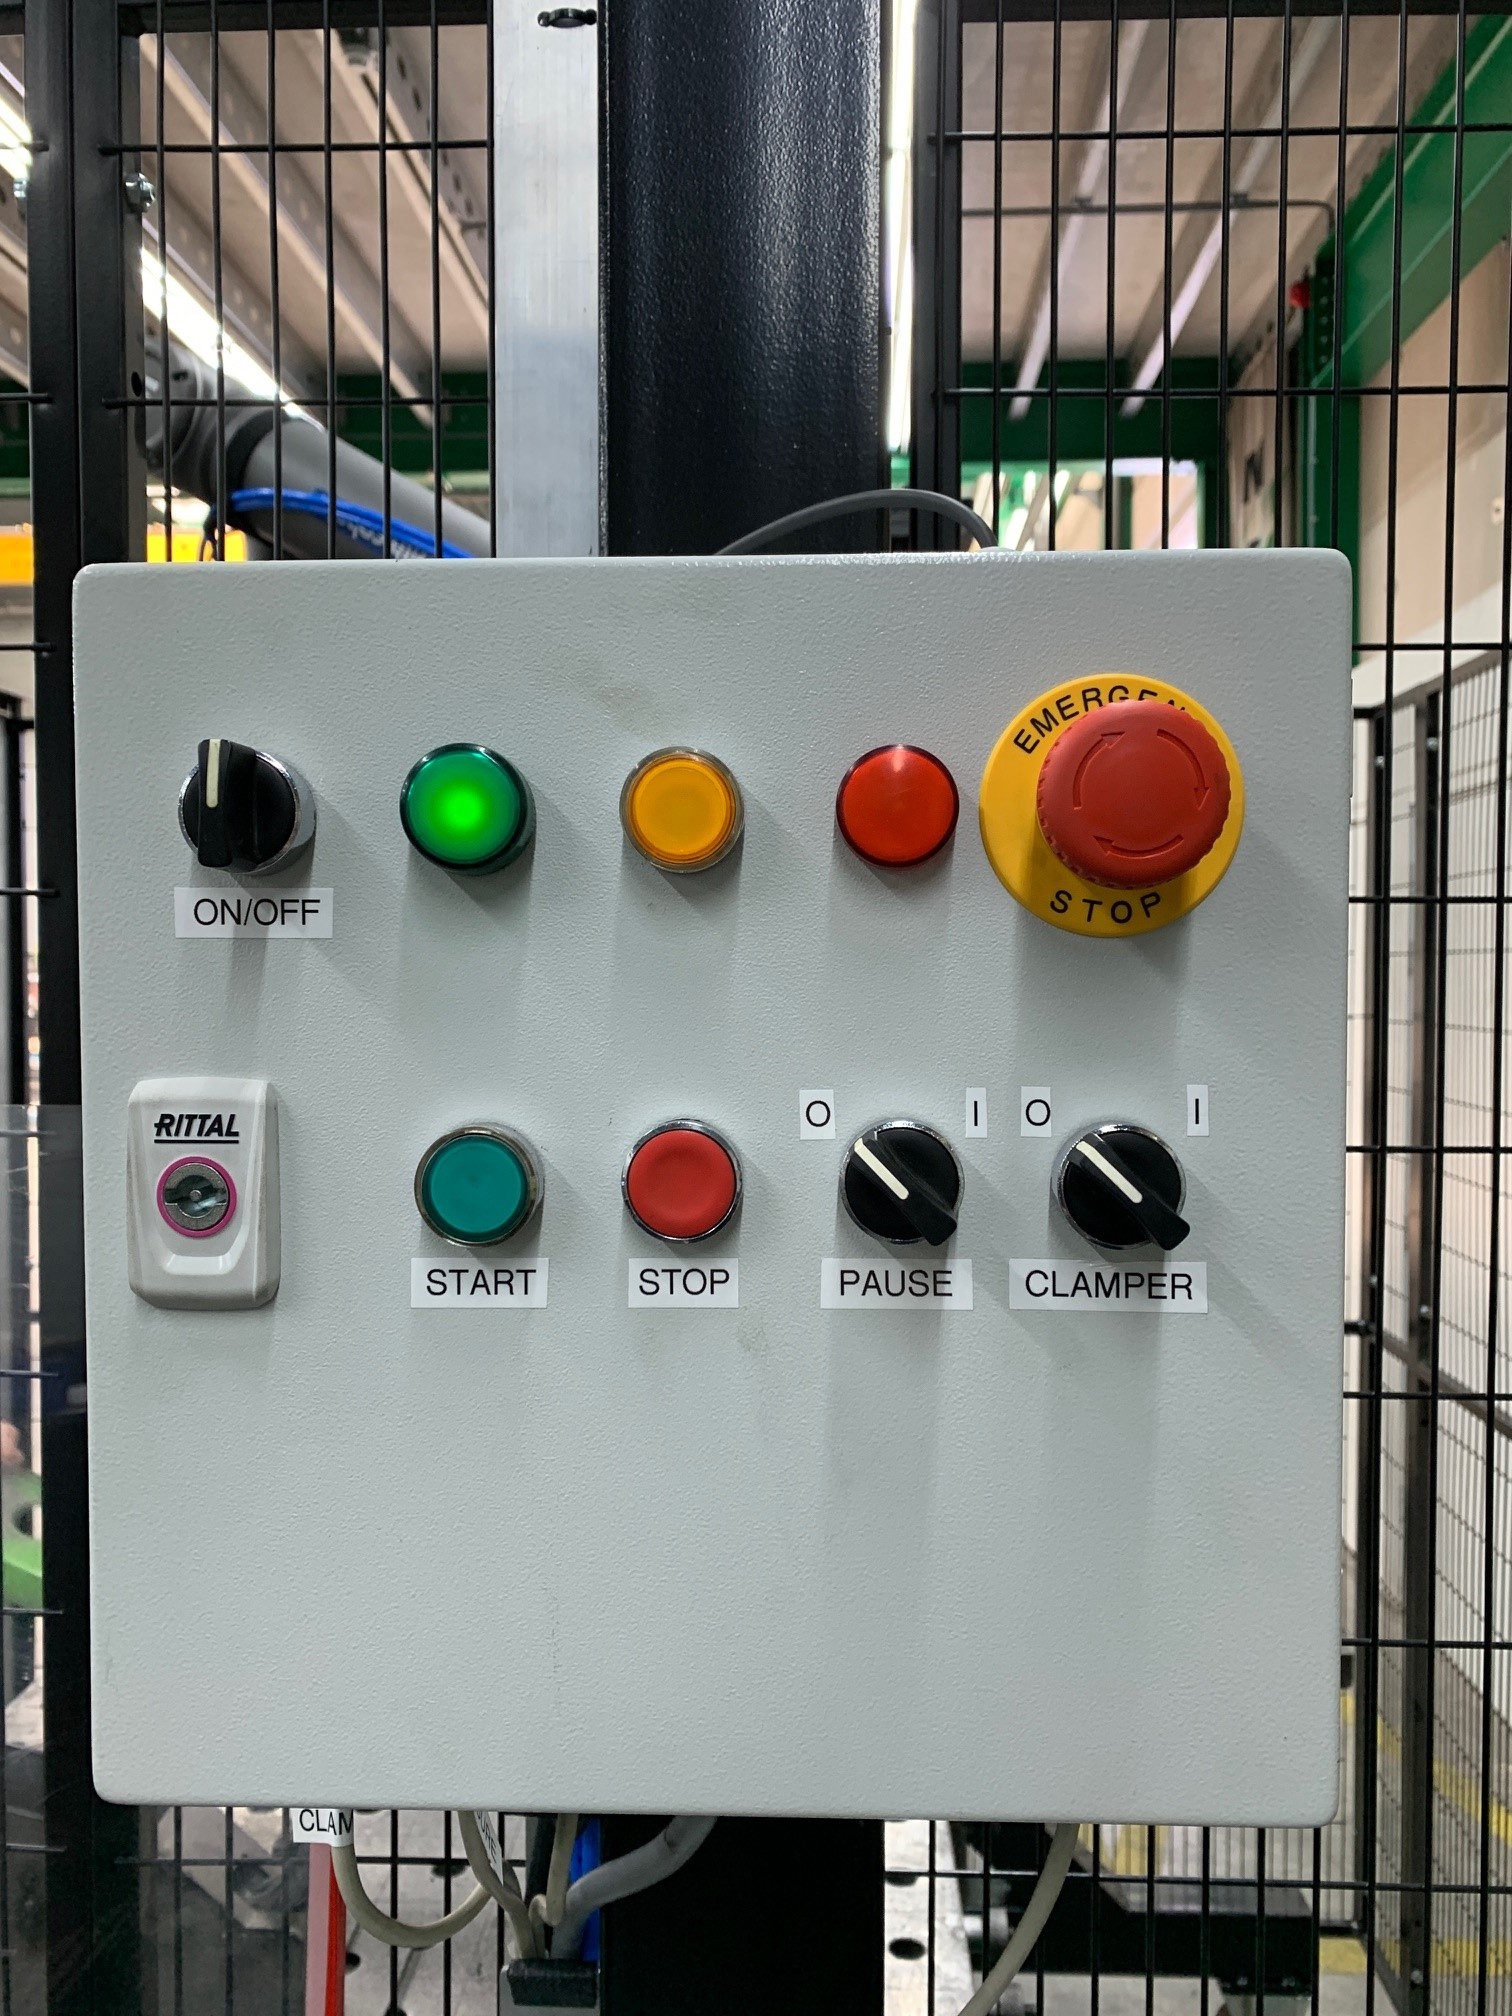
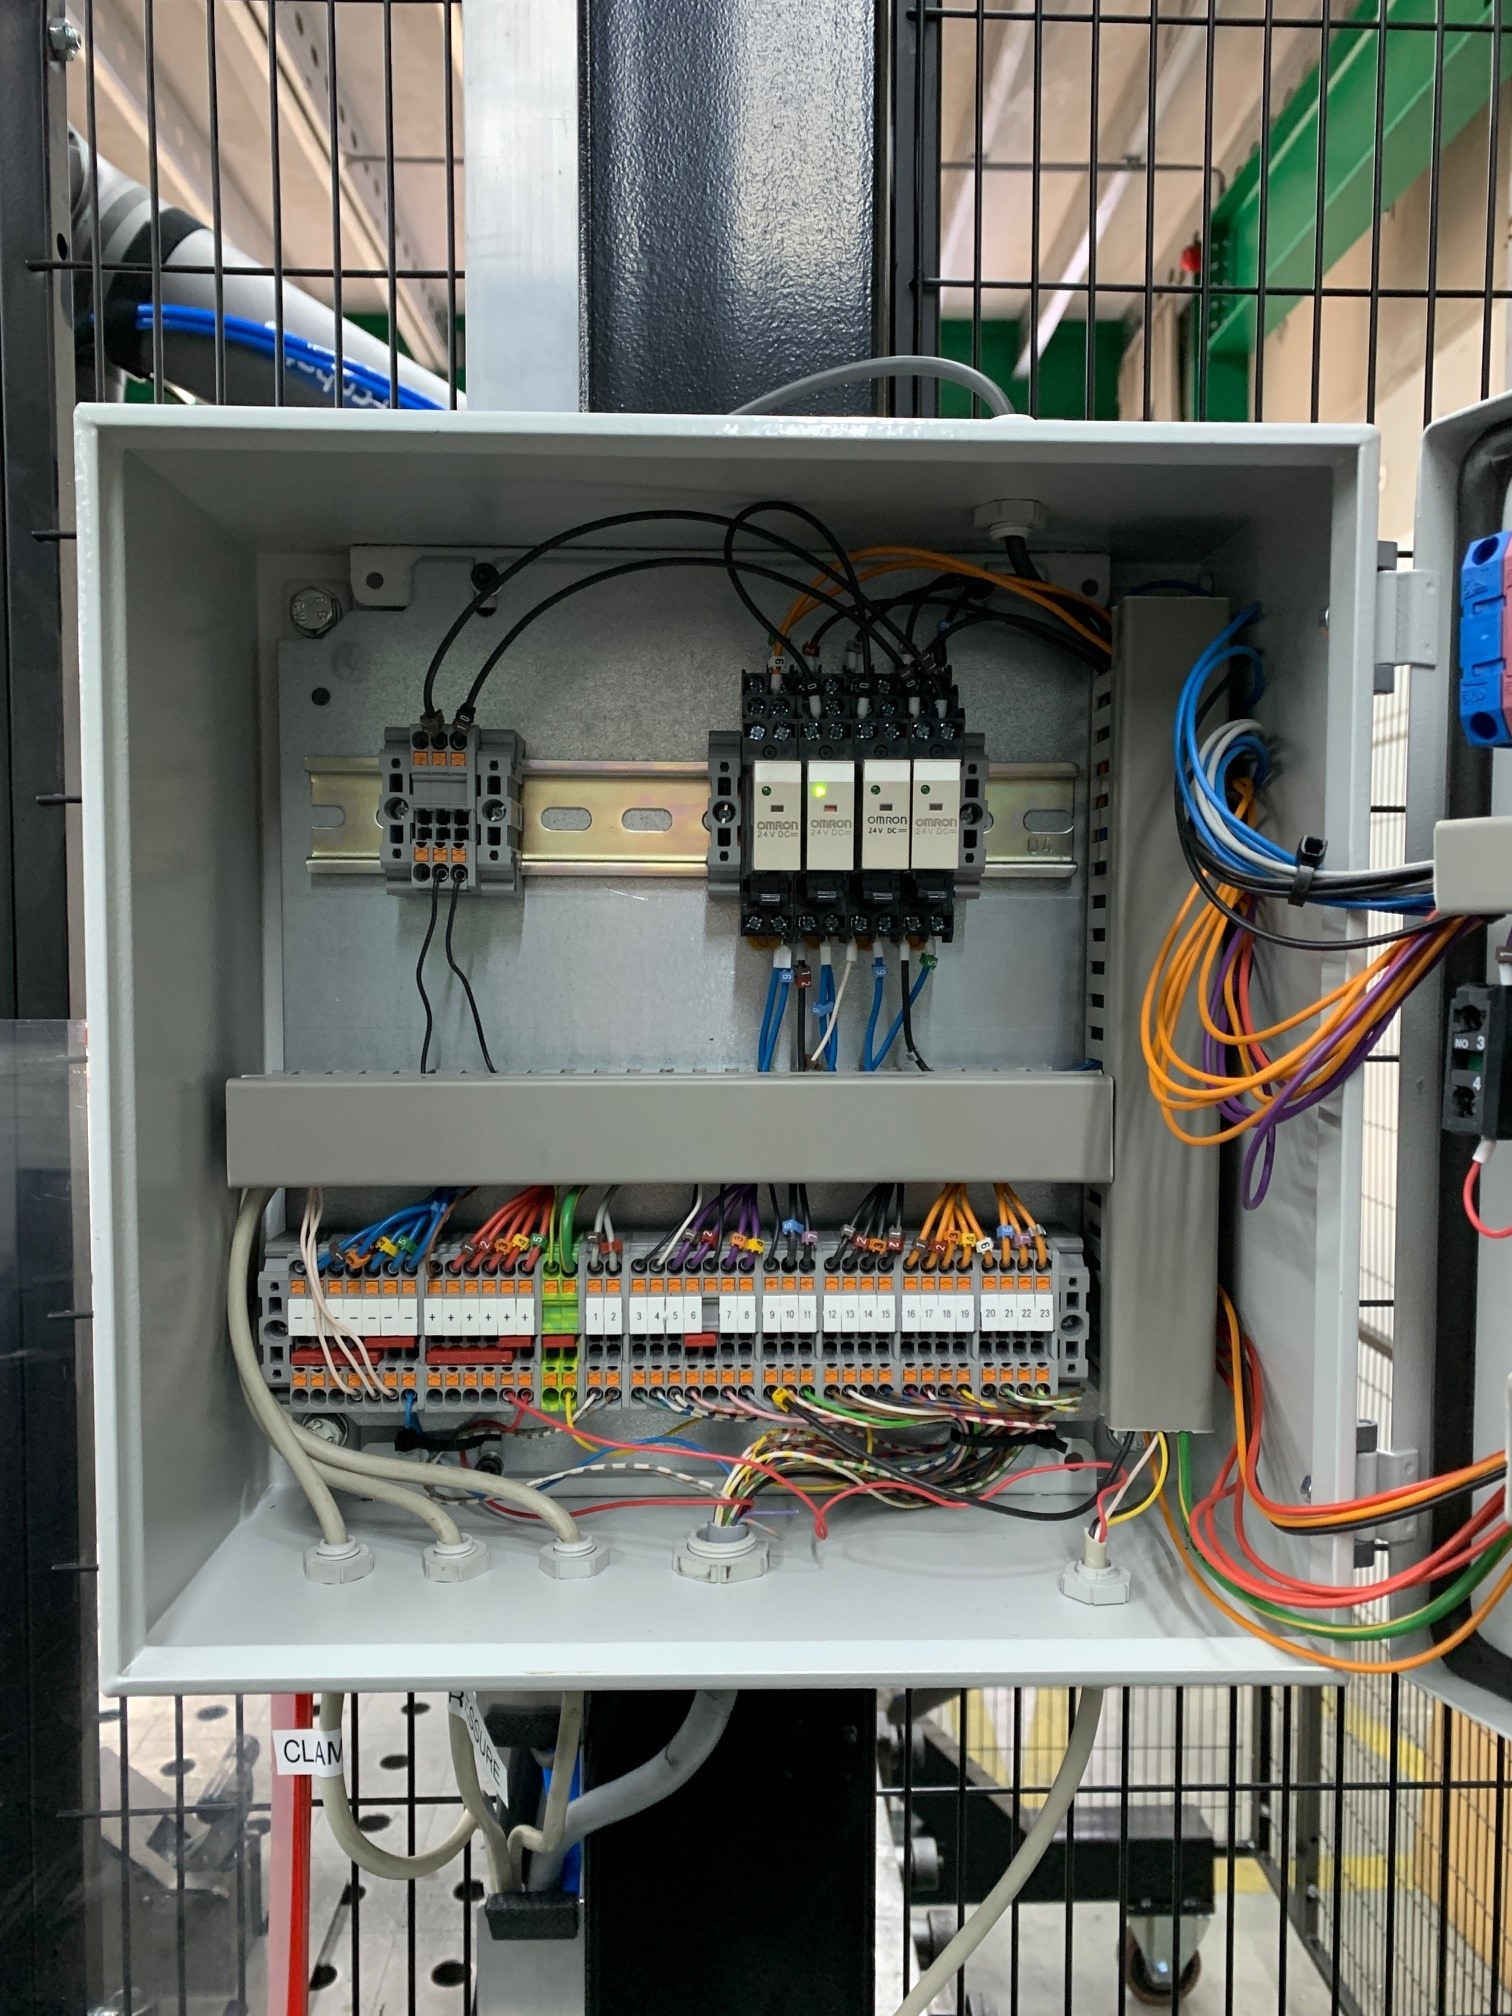
Electrics
The electrical cabinet we’ve developed consists of many terminals, relays, buttons, switches and lights as shown below. The terminals are all neatly connected to the right ports in the PLC through a 27-vain cable. The button layout in combination with the user manual we’ve created shows the functions of every button, switch and lights. The user manual is linked down below as well.

Safety precautions
We have added many safety precautions. First and foremost we’ve added an emergency button. Secondly we’ve added a dead man’s switch and lastly we’ve added fencing all around the robot. These three precautions make for a very safe environment to work in. Take a look at the user manual posted in the previous paragraph to find how all the buttons and switches work. The image below shows the whole work space layout and in the video you’ll see a walk around shot of the work space.
The video below shows how the dead man’s switch stops the spindle when you release the button.
End results
By many trial and error processes we’ve been able to succesfully grind off welding seams and succesfully execute a quality control. Creating an automated system wasn’t the only thing we’ve learned a lot about. In the course of the project we found that we had to add more and more safety precautions as our previous precautions appeared to be not sufficient enough. We have learned lots of new things from metazet, as the practical approach almost always turns out to be a little bit different then the theoretical approach. We’ve managed to close this gap enough to come up with a well functioning automated welding seam grinder.