Students: Robin Kouwenhoven, Milan Bakker, Lauri Tuomaala, Ibnu Haafizha Yoga. (2023)
Introduction
ID-Tec supplies innovative solutions for inspecting, cleaning and renovating pipes, tanks and other spaces that are difficult for people to reach. The company is situated in Poeldijk, The Netherlands. They have six brands that they market with: Sewer Robotics, Pro-Jetting, DiveWise Equipment, Mobil Power, Natrixx and the brand new brand Non-Entry Welding. We will work this project for Non-Entry welding.
Current situation
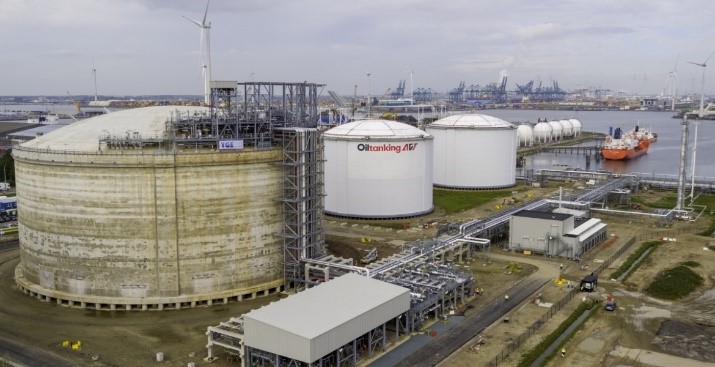
In the harbor are several big tanks that store stuff like Butaan, oil, fuel, etc. These tanks needs a mandatory inspection every few years to see if there are any cracks in the wall. Currently there is already a robot involved. But only for cleaning the inside and locating the approximate location of the crack. Then an ATEX-certified worker goes in to the thank, to the damaged spot and starts the welding by hand. The ATEX directives are two EU directives describing the minimum safety requirements for workplaces and equipment used in explosive atmospheres.
The problem
The issue with the current way of working is that it is not preferred because of the explosive environment. Although the workers are certified and the equipment is as well, the idea is to not jeopardize anyone. Besides, there are very less people that want to do this job so the companies can not find people to repair these tanks.
Solution
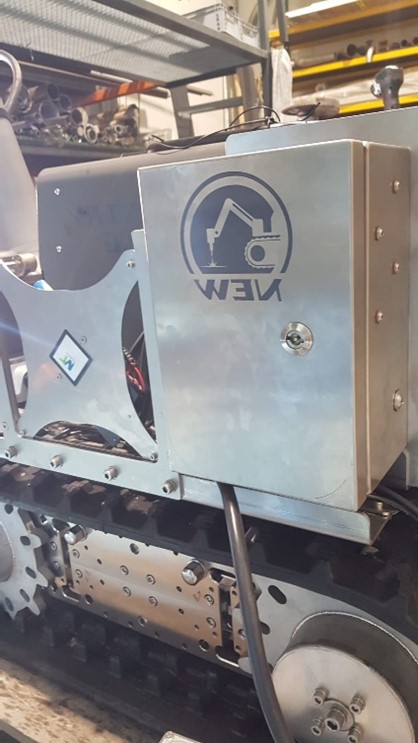
The solution for this is to attach a robot arm to a carrier so that a robot can automatically place a plate on the right position and weld it. This will be done by the Omron Techman 12 Cobot arm that is mounted on a Crawler (vehicle that is made by ID-tec). This has already been done by the previous group (link: https://www.robotminor.nl/welding-robot-on-crawler-id-tec/ ).
But there are also cracks on the wall of the tank and these also need to be fixed and for this we got a solution! To solve this problem we redesigned the attachment of the cobot and we improved the cable management. Besides, we needed something that holds the steel plate to the wall. The solution for that: we added a fully extra End of Arm tool (EoAT).
New design
The Techman robot controller can not handle dusty and dirty environments. So for this we removed this controller from the Crawler and placed it alongside the laptop. When the crawler with robot arm goes into a tank, the laptop and Techman control box will stay out of the tank and will be attached to the crawler with a long cable.
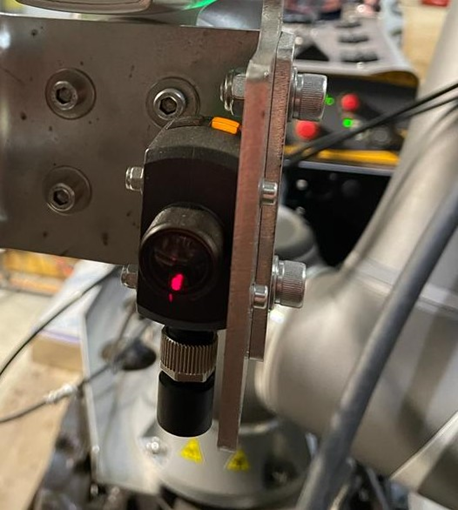
We designed new brackets to locate the welding plates, hold the new extra EoAT and redesigned the current EoAT. We needed a new EoAT because the current one has 3D printed parts and that is going to melt and not strong enough when you are welding and we added a laser sensor to know the distance from robot to the wall.
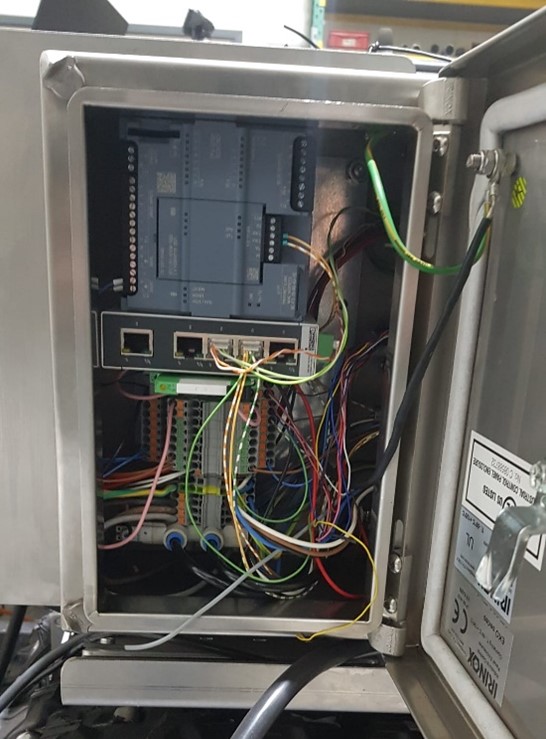
Wiring Harness
To make all the electrical and pneumatic (for suction cup) connections nice and properly, we used a “Junction box”.
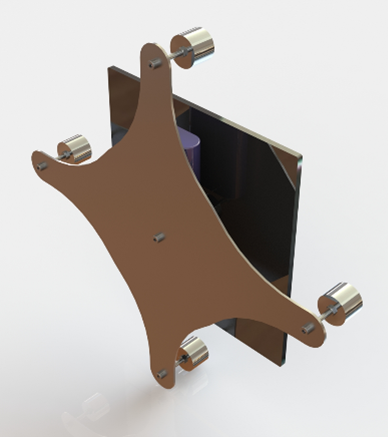
Extra EoAT
The working of the extra EoAT is explaind below. Because the name it is a bit confused what we mean by extra EoAT and that is why we choose to name the extra EoAT from now on “holding plate”.
- The suction cup that is mounted on the EoAT of the robot picks up
 the holding plate.
 - The suction cup with the holding plate moves to the steel plate that needs to be welded and pick up this steel plate with two electromagnets that is
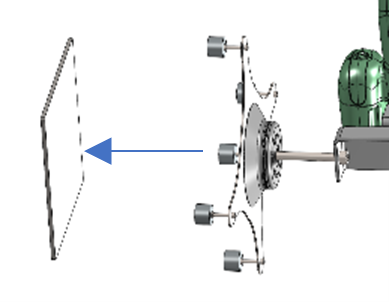 mounted in the center of the holding plate (see picture)
 - The robot moves to the wall where the welding plate needs to be weld an place the plate on the right position.
- The four outer magnets will then be activated, this means that the magnets are now stuck to the wall.
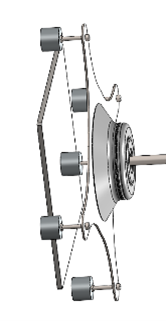
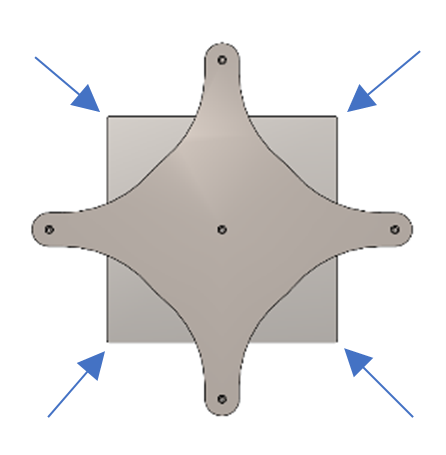
- The robot can release the suction cup and do four sportwelds on the corners of the steel plate.
- When this is done the robot can pick up the holding plate with the suction cup. When the suction cup is stuck to the holding, all the magnets can be deactivated, and the robot can start finishing the welding process.
On the holding plate is a battery pack, a relay radio frequency (RF) receiver and the electromagnets mounted. To control the electromagnets, we used the Techman robot controller and wired a RF transmitter to it.
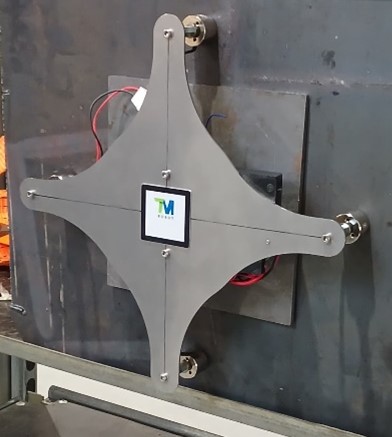
Project result
After a lot of hard work we were able to place the welding plate to the wall and weld it!
Unfortunately we were not able to integrate the laser distance sensor in the code so we still do that manually.
Epilogue
We would like to thank Pepijn van Holsteijn for giving us this project and working with us. We would also like to thank Thijs Brilleman, Guus Paris and Mathijs van de Vegt for the tech support during the project.